
-
-
In this lesson we're going to combine the line follower program with some obstacle avoiding code!
-
This should allow the robot to easily drive around obstacles, and then find the line again.
-
Hopefully yours should work like our example in the video!
-
-
-
Let's put an obstacle on the track for the robot to avoid.
-
You can use anything you like, as long as it is at least 4cm tall.
-
Put it across the track wherever you like! However, having a straight section of track both sides of the obstacle will make it much easier.
-
You can use books, wooden blocks, or anything else you have around. You might need to tape it down if its very light so the robot doesn't just push it around.
-
-
-
We're going to use a switch module to detect when we hit the obstacle.
-
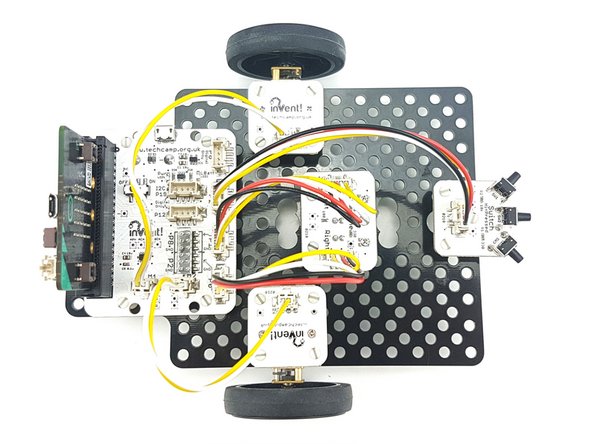
Assemble your robot like the picture
-
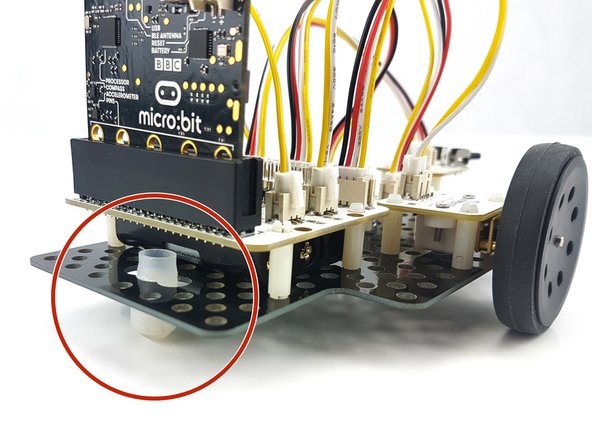
Make sure the switch is in the middle!
-
You will need to move the trackball to the back of the robot, underneath the main board, to keep it balanced.
-
-
-
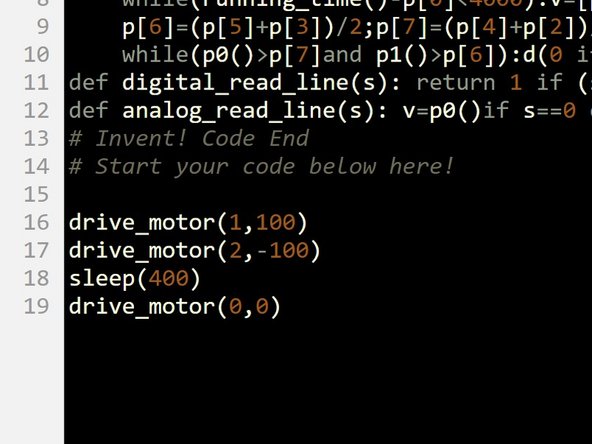
We're going to need to turn the robot 90 degrees again to complete this challenge.
-
Write the simple program in the picture and work out how many milliseconds you need to wait for your robot to turn 90 degrees.
-
-
-
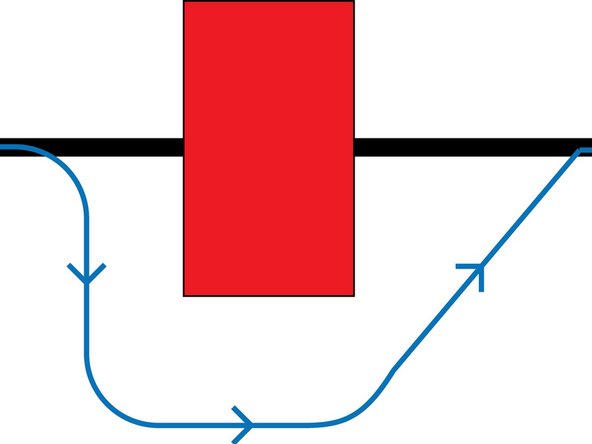
We need to decide how we want the robot to move so it avoids the obstacle.
-
You might need to change this slightly depending on the size and shape of your obstacle! When the switch is pressed we need to:
-
Turn right 90 degrees
-
Drive forwards
-
Turn left 90 degrees
-
Drive forwards
-
Turn left 45 degrees
-
Drive forwards until 1 sensor finds the line (0)
-
-
-
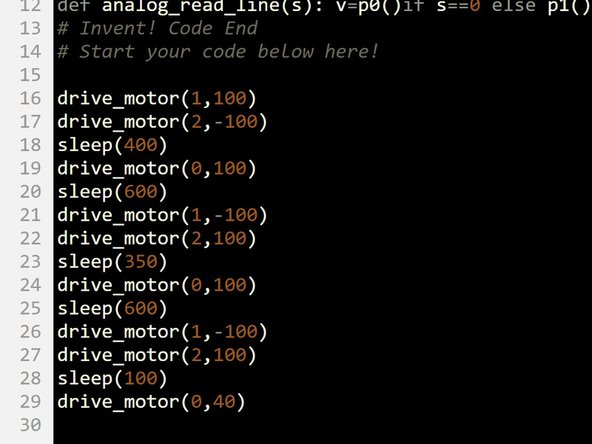
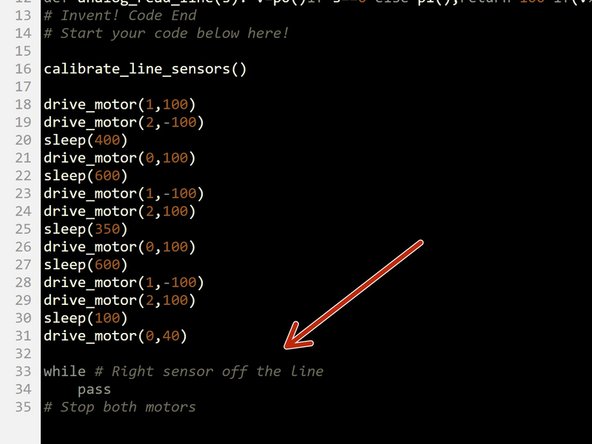
Using the wait time you worked out earlier for turning 90 degrees, write a simple program to make your robot drive around the obstacle.
-
Our code is just an example - you will need to change all of the times depending on the size of your obstacle!
-
Test your code properly until your robot reliably drives around the obstacle
-
Driving at 45 degrees to the line after the obstacle is very important - if we drive directly at the line, both sensors might find the line at exactly the same time and the robot might drive into the obstacle!
-
-
-
After the robot has driven around the box, it should drive forwards until the right sensor finds the line again.
-
Add a while loop and another motor line at the end of your code, so the robot stops when it finds the line again.
-
Make sure you add the calibration line in at the top of the program as we are using the line sensors again.
-
There is a hint layout if you need it!
-
-
-
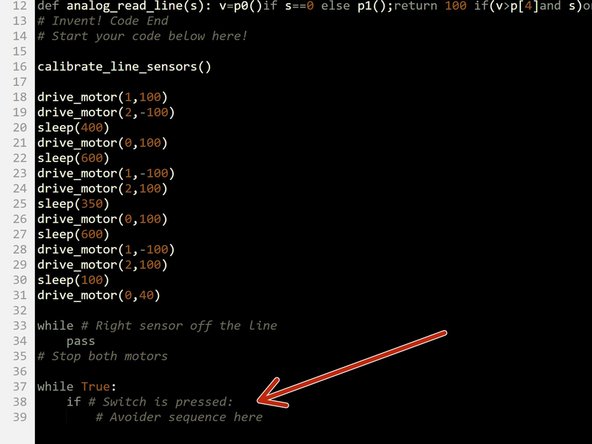
Almost there! Let's add an IF statement so our sequence is only triggered when the switch is pressed.
-
There is a hint if you need it, but you should be pretty good at using switches by now!
-
Don't forget, you will need to move all your code into a while True: loop so the switch isn't just checked once.
-
-
-
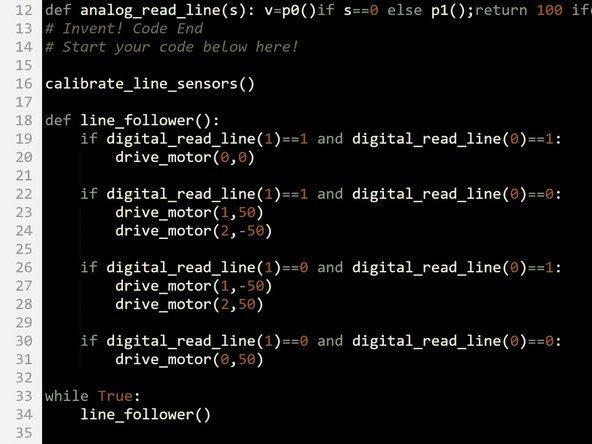
Time to combine the obstacle avoiding code with our line follower code.
-
Load up your 2 sensor line follower code - it should look similar to the one in the picture.
-
Add your obstacle avoiding sequence to the line follower code, and test it on the track - hopefully it drives round the obstacle and finds the track again!
-
If it doesn't work, try adjusting the code and keep testing until it works really well!
-
-
-
If you've finished all that, add your Sparkle module back on to the robot, and add the blocks back in to display the line position with the red/green Sparkles.
-
When the robot is avoiding obstacles, make the Sparkles do something else so we know the robot is driving round the obstacle.
-
They can do anything you like: flashing white, orange or something else entirely - the more impressive the better!
-


Team
