
Introduction
Our robot isn't very useful if it can't tell us how its mission is going. Let's learn about outputs and use some LEDs so it can talk back to us!
-
-
All robots have some way of telling the user what they are doing
-
This is called feedback - it is very important as it is very hard to understand what your robot is doing without it!
-
Take a washing machine for example - they always have lights on the front to tell you what is going on.
-
What about a robot hoover - they have feedback to say when they've finished, or when they need recharging
-
-
-
Let's add some LEDs to our robot so we can get some feedback about the mission.
-
Add the LED module to your robot like the picture.
-
Plug the Red side into the space marked P1
-
And the Green side into the space marked P0
-
-
-
The green and red LEDs are both outputs
-
An output is the name for anything that can be controlled by the Crumble 'brains' of your robot
-
Outputs can be set to either ON or OFF - there is no in between! In electronics, we call on 1, and off 0.
-
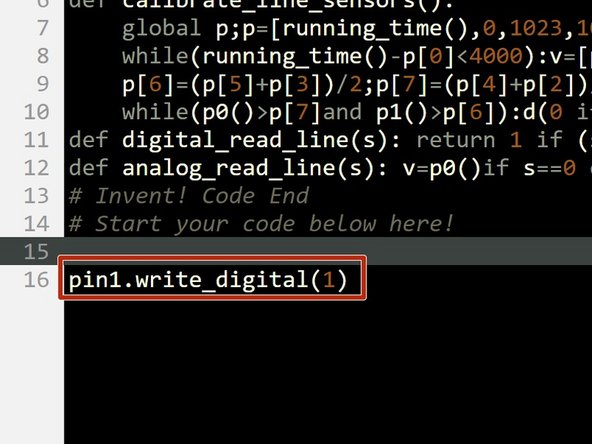
Copy the program in the picture and upload it to your robot. The red LED should light up!
-
-
-
We have used a new function to turn on the LED - write_digital
-
This function allows us to turn any pin on (1) or off (0)
-
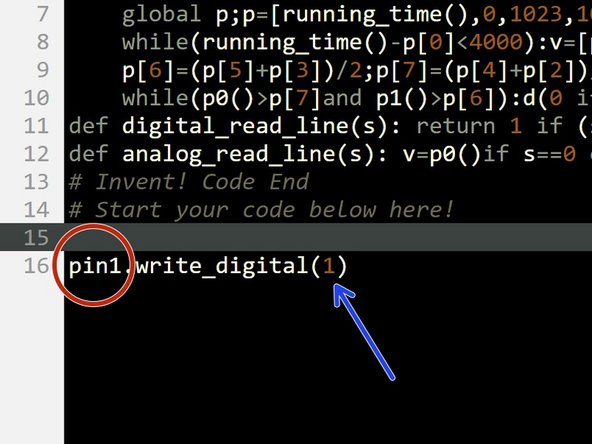
We start with the pin we want to change - in this case we used pin1 as the red LED is plugged into P1, but we can use any of the connectors on the board.
-
See if you can see the rest of the connectors on the board - you should have P0, P1, P2, P8 and P12.
-
write_digital takes just 1 input - 0 to turn the pin off, or 1 to turn the pin on.
-
Try changing the code so the green LED turns on instead. The green LED should be connected to P0!
-
-
-
We can use lots of write_digital lines to turn things off and on whenever we like!
-
Using write_digital and sleep functions, write some code that:
-
Turns on the green LED
-
Waits 1 second
-
Turns off the green LED, and turns on the red LED
-
Waits 1 second again
-
Turns off the red LED
-
-
-
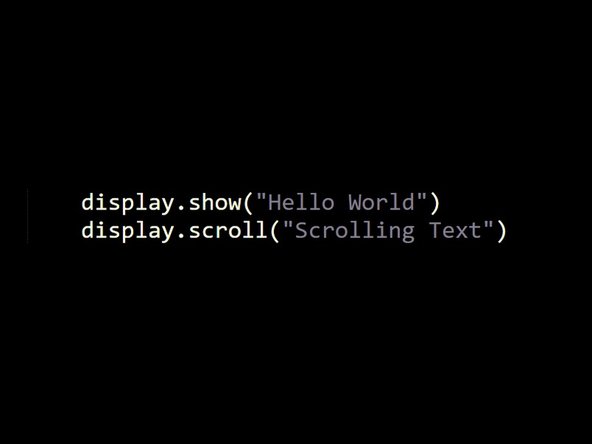
The micro:bit also has an LED screen built into it, which is great for giving feedback as it can show lots of different things.
-
There are two basic functions which are great for showing things on the screen:
-
display.show() - this flashes text on the screen letter by letter
-
display.scroll() - this will scroll text across the screen smoothly.
-
Try out the examples in the picture!
-
We won't use the screen much in these tutorials, however feel free to use it whenever you like to improve your programs, or add extra features to make things better!
-
You can find out more about all of the different things you can do with the screen on this page: http://microbit-micropython.readthedocs....
-
-
-
Load up your program that crosses the planet, picks up the astronaut, turns and drives back.
-
Add some write_digital lines to turn on the red LED before the astronaut is picked up, then the green one after they are picked up and when the robot is driving back
-
Now your robot is giving some real feedback, so you can see from your base when it has picked up the astronaut!
-


Team
