
Introduction
You are the chief programmer for a mission to Mars that has crash landed, and one of your crew is stranded on the other side of the planet! Let's learn how to make our robot move so we can save them.
-
-
Let's assemble our robot so we can get started.
-
We need to assemble the main board first - this is the brain of the robot, and controls everything it does!
-
So we can use it without the cable plugged in, turn the board over and insert the batteries. Make sure they are the right way around.
-
Next, plug in the micro:bit to the long black connector - make sure it is the same way round as the picture, with the LEDs and buttons facing forwards.
-
-
-
Next, plug the main board and motors into the baseboard, just like the picture.
-
Use the two yellow/white cables to connect the two motors to the main board.
-
Make sure you plug the left motor into the left socket (M1) and the right motor into M2!
-
-
-
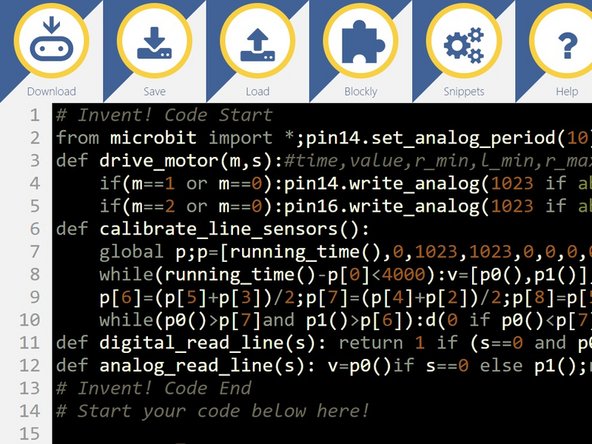
Open the editor which you downloaded in the Getting Started section - you can download it again here if you need to.
-
Paste the Invent! starter code into the top of the program - again, you can get it here if you need to.
-
Plug in your robot with the USB cable.
-
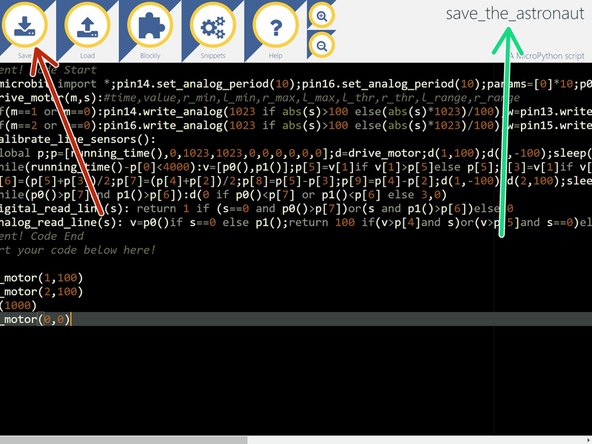
Make sure your editor looks like the picture, and we are ready to start programming.
-
Don't forget - make sure you have this code in every program you make, otherwise the motors (and some other modules we get to later) won't work properly.
-
-
-
Now we're all setup, let's make a simple program so the robot drives forwards.
-
After the Invent! code , add the following two lines into your program:
-
drive_motor(1,100)
-
drive_motor(2,100)
-
Can you guess what the robot will do? Upload the code and find out!
-
-
-
If you guessed drive forwards - you are correct! Let's have a detailed look at the drive_motor line and how it works:
-
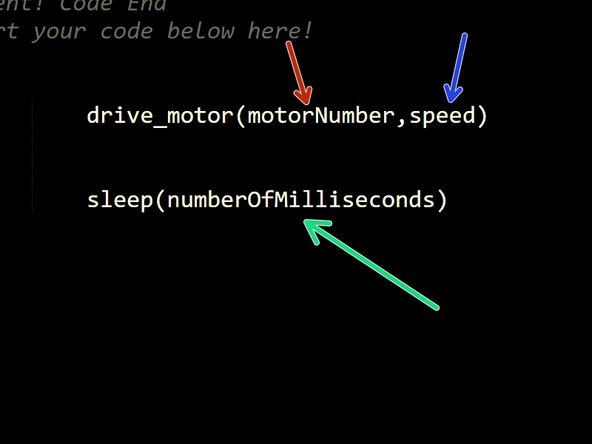
drive_motor is a function (this just means that it does something), which takes 2 inputs:
-
The motor to drive - this can be 1 (left motor, M1), 2 (right motor, M2) or 0 (both motors)
-
What speed to drive it at - this can be any number from -100 (full speed backwards) to 100 (full speed forwards)
-
We're also going to be using another function - sleep. This function just waits for however long you want it to.
-
The sleep function takes just 1 input: how many milliseconds to sleep for. In programming, time is usually measured in milliseconds. There are 1000 milliseconds in 1 second.
-
-
-
Let's change the code so the robot doesn't drive forever.
-
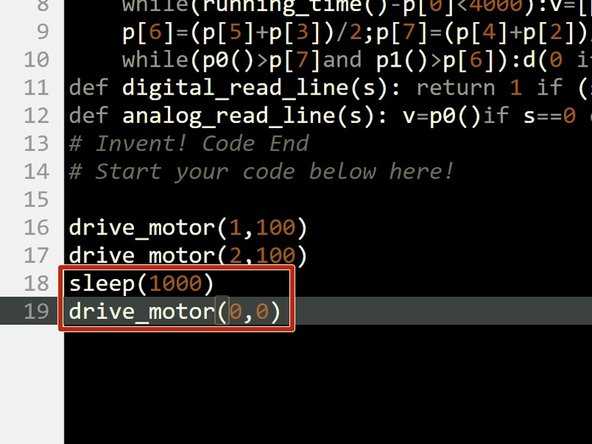
Change your program so it looks like the picture - now we are using both the drive_motor and the sleep functions.
-
Can you guess what they might do?
-
sleep(1000) just makes the robot wait for 1 second (don't forget - there are 1000 milliseconds in 1 second
-
The final drive_motor line should make the motors
-
Upload and test the program - your robot should drive forwards and then stop!
-
-
-
To save the astronaut, we need to attach the magnet module to the robot so we can pickup the magnetic astronaut.
-
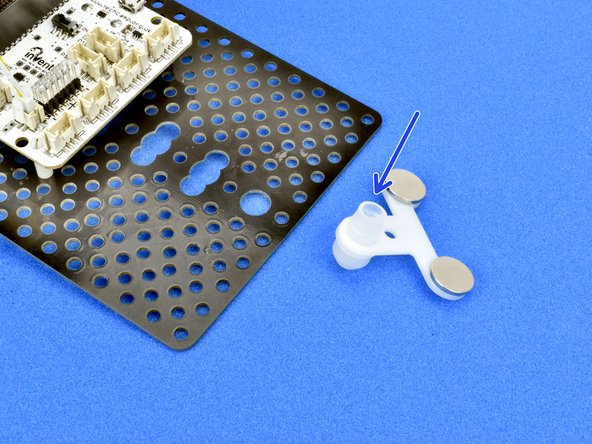
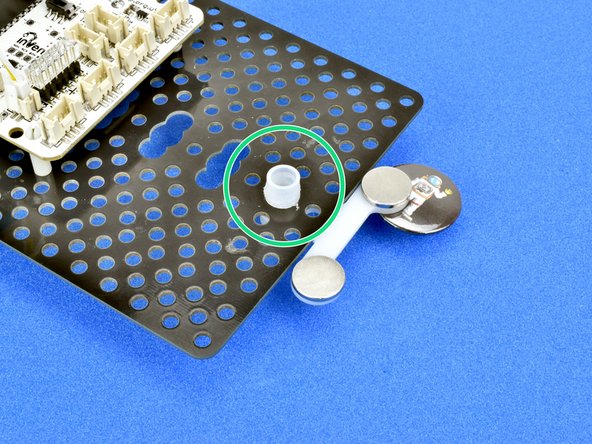
Remove the white trackball from the front of the robot - if you have a brand new kit it might be quite hard to get out, so ask your teacher for help if it is too difficult.
-
Slot the magnet module over the top of the trackball, with the magnets facing upwards like in the picture.
-
Finally put the trackball back into the robot like the picture. You should now be able to pickup an astronaut!
-
-
-
Now you can make your robot drive and stop, and have some magnets, you need to save the stranded astronaut.
-
Write a program to make your robot drive forwards across the planet and pick up the astronaut. You will need to change the sleep time so it drives forwards the right amount!
-
-
-
After each challenge, make sure to save your work - you might need it later!
-
Try to give your programs descriptive names so you know what they do.
-
-
-
For this extension challenge, add some more lines of code to make your robot:
-
Drive forwards
-
Pickup the astronaut
-
Reverse back again
-
See if you can work out how to change the numbers in the drive_motor lines to make the robot reverse - make some changes and try it out!
-


Team
