
Introduction
Learn how to use the Sparkle module by creating some starting lights for a race around the planet.
-
-
Sparkles are very useful - they are LEDs, just like the red/green LED from before, but much cleverer!
-
They have small chips inside them, which allow you to control many LEDs using just one output. If you look really closely you might be able to see them.
-
They are also three LEDs in one - there is a red, green and blue LED in every sparkle.
-
We can control these three internal LEDs separately, and mix them together to create any colour!
-
-
-
Build up your robot like the picture.
-
Plug the sparkle module into P0.
-
-
-
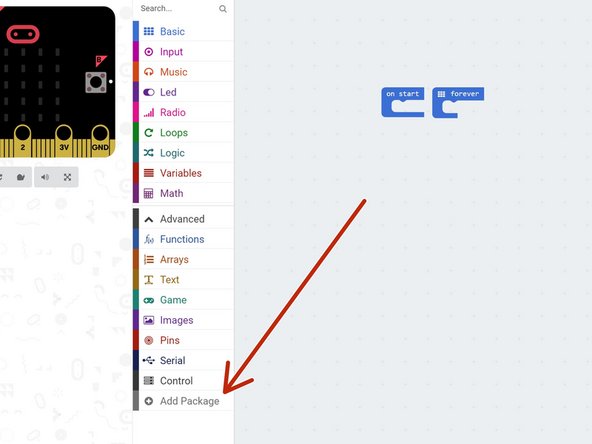
To use Sparkles with the micro:bit, we need to add another package called Neopixels (this is just another name for Sparkles).
-
Click the Add Package button at the bottom of the advanced menu.
-
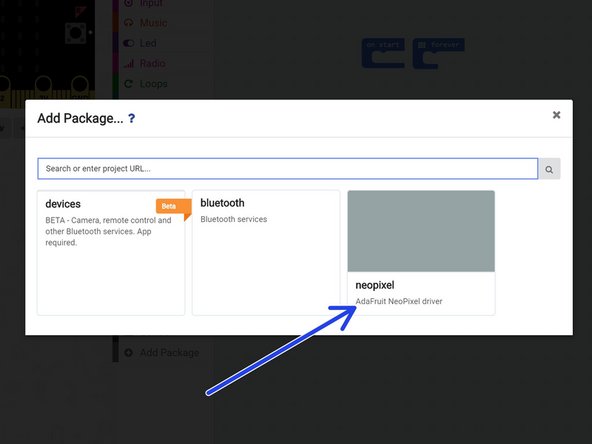
In the box that appears, click on neopixel.
-
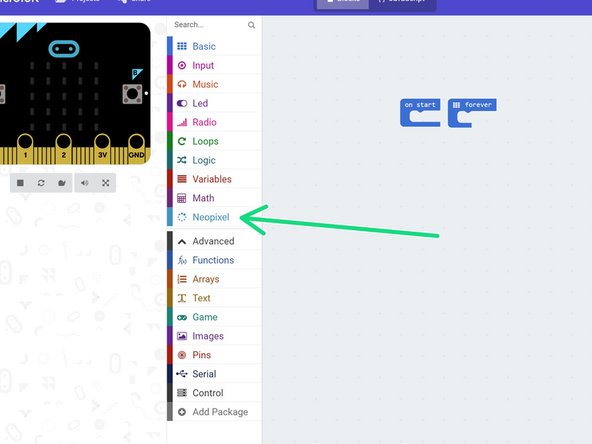
You should now have a Neopixel light blue menu in your editor!
-
-
-
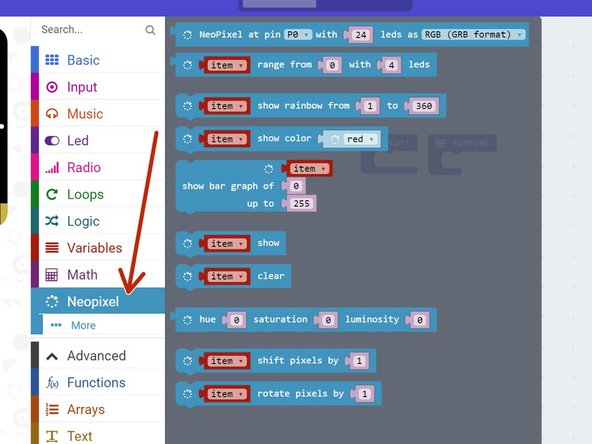
All the blocks we need for sparkles are in the new neopixels menu. Click on it and have a look at all the new blocks you can use.
-
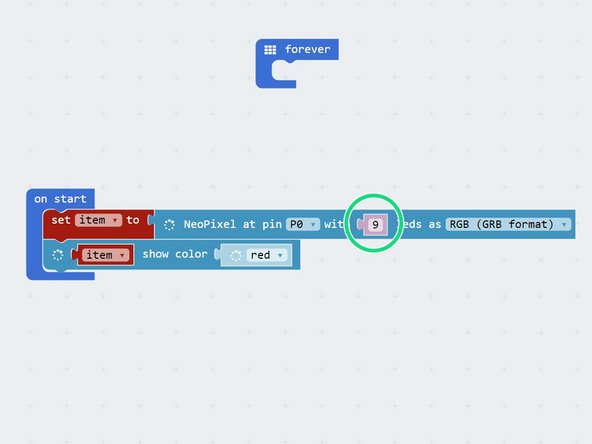
For now, let's test the sparkles by building the simple program in the picture - hopefully they all turn red when you program your robot!
-
Don't forget to change the number of LEDs to 9.
-
Don't stare at the sparkle board for too long - it's very bright!
-
-
-
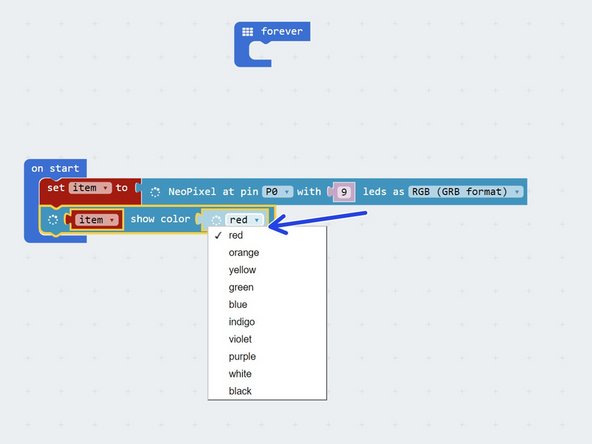
It's really easy to control the red, green and blue LEDs separately to make any colour we like.
-
Click on the colour name to bring up the colours list - try a few different ones and see how they look!
-
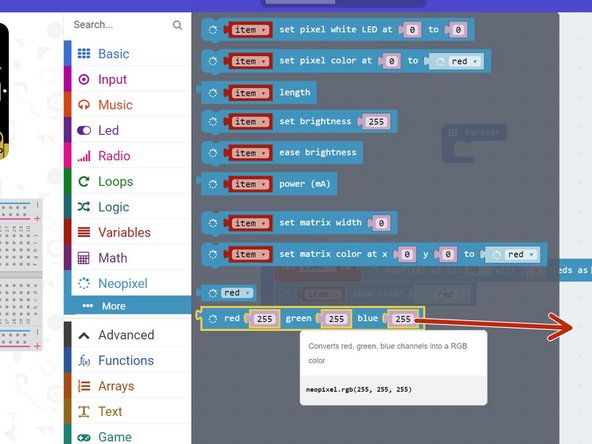
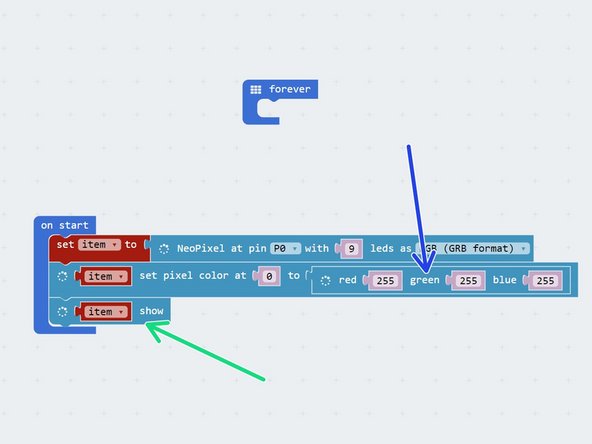
To get colours not on the list, we can put in the values for red, green and blue directly.
-
From the more menu, drag in a red, green, blue block.
-
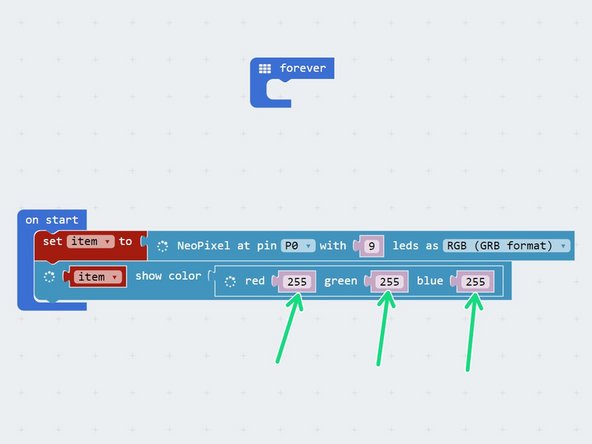
Drag this into the show colour block like the picture and try changing the 3 numbers, to see what colours you can make.
-
The sparkles use quite a lot of power on full brightness - switch off your board when you aren't using it to save battery life.
-
-
-
Remember, we can also control each sparkle individually!
-
Use a set pixel colour block from the more menu to do this.
-
You can also use the set pixel block with red, green and blue values, like before, to get any colour you like!
-
Whenever you set pixel colour individually, you also need to update the strip as it isn't done automatically - use a show block to do this, like in the picture. If you don't use this block, the sparkle won't change!
-
In programming numbers start from 0, not 1 - so for three sparkles, the first is 0, the second is 1 and the third is sparkle 2.
-
Use three of the individual set pixel colour blocks to set the first three sparkles to different colours.
-
-
-
Let's make a set of starting lights for a race across the planet surface.
-
Check out the F1 starting lights in the video - can you put together a program using sparkle and wait blocks to make your own?
-
The lights should turn red 3 at a time, then all go green at the same time.
-


Team
