
Introduction
Learn how to use the Sparkle module by creating some starting lights for a race around the planet.
-
-
Sparkles are very useful - they are LEDs, just like the red/green LED from before, but much cleverer!
-
They have small chips inside them, which allow you to control many LEDs using just one output. If you look really closely you might be able to see them.
-
They are also three LEDs in one - there is a red, green and blue LED in every sparkle.
-
We can control these three internal LEDs separately, and mix them together to create any colour!
-
This is the same way pixels in your computer screen work - have a look at the chart to see all the possible colours we can make.
-
-
-
Build up your robot like the picture.
-
Sparkles must always be plugged into d1 - this is very important as otherwise they won't work!
-
-
-
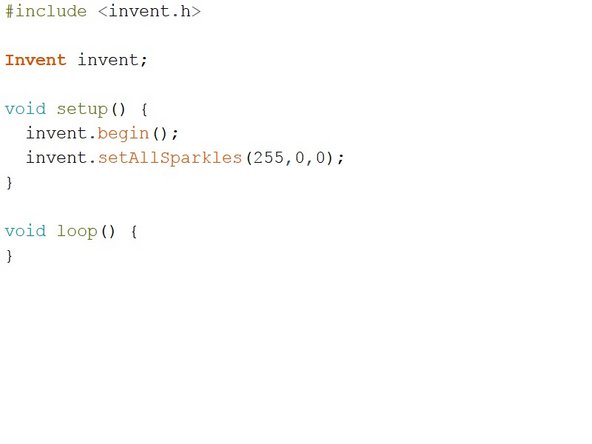
For now, let's test the sparkles by building the simple program in the picture - hopefully they all turn red when you program your robot!
-
Don't stare at the sparkle board for too long - it's very bright!
-
-
-
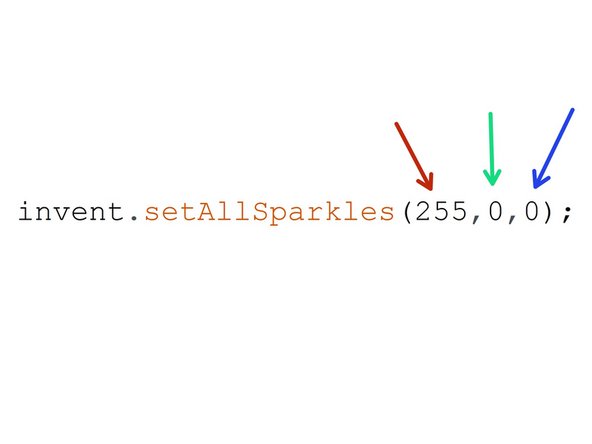
It's really easy to control the red, green and blue LEDs separately to make any colour we like.
-
The three numbers in the invent.setAllSparkles() function set the red, green and blue levels of the LEDs - they can be any number from 0-255
-
Try changing the numbers and see what colours you can create!
-
-
-
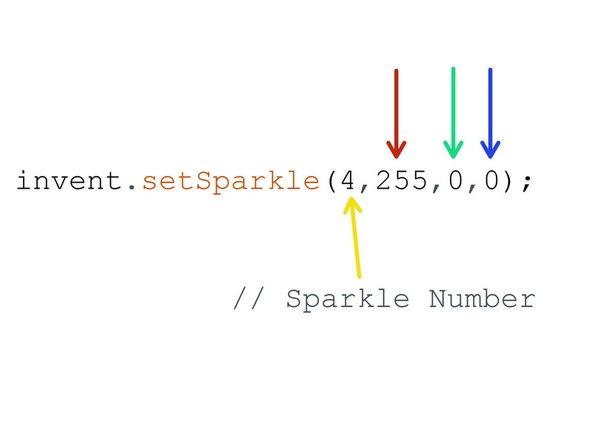
Remember, we can also control each sparkle individually!
-
We can use invent.setSparkle to set the colours of individual sparkles. This function needs 4 numbers - the number of the sparkle to set, and the r,g and b values as before.
-
In programming numbers start from 0, not 1 - so for nine sparkles, the first is 0, the second is 1 and the last is sparkle 8.
-
Use three of the individual sparkle set blocks to set three sparkles to a different colour.
-
-
-
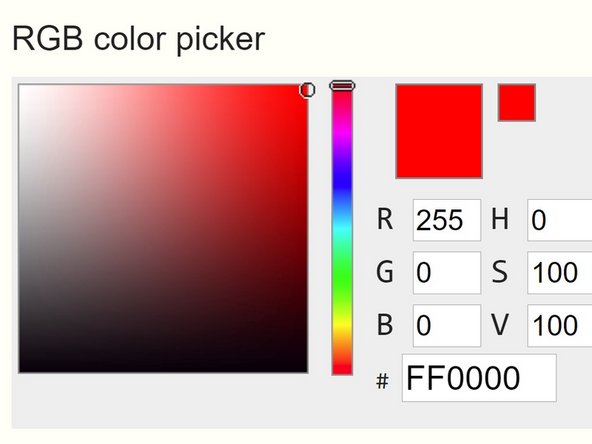
It can be difficult to know what to set the red, green and blue to to get a specific colour!
-
Try this online colour picking tool - you can pick any colour you like, and it will give you the red, green and blue values you need.
-
-
-
Let's make a set of starting lights for a race across the planet surface.
-
Check out the F1 starting lights in the video - can you put together a program using sparkle and wait blocks to make your own?
-
The lights should turn red 1 at a time, then all go green at the same time.
-


Team
