
Introduction
Let's use the Sparkle module and some switches to make a colour mixer!
-
-
Remember how each Sparkle contains 3 different colour LEDs?
-
We're going to make a program using variables, that allows you to change the Sparkle colour using the 2 buttons on the micro:bit.
-
Assemble your robot like the picture first!
-
-
-
Let's setup the start of our program.
-
We are going to need 3 variables this time - one for red, one for green, and one for blue
-
Add four new variables using the "Make a Variable" button in the variables menu.
-
Call them r, g and b (for red, green and blue), and one called sparkles for the neopixels.
-
We're going to use each of these variables to remember the amount of red, green and blue light we want.
-
-
-
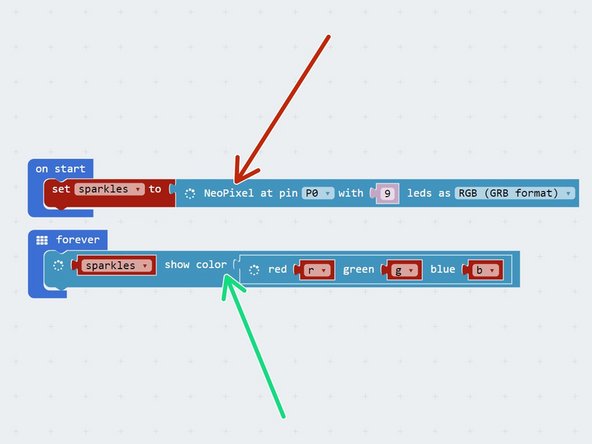
In on start, setup the sparkles using the variable you just created. Make sure you set it to P0 with 9 LEDs.
-
We want to make sure we are continually updating the sparkles with the current values of r, g and b.
-
Add a block to the forever loop to do this, just like the picture.
-
-
-
We need to do one more thing before testing the program.
-
Before you use a variable in a program (like we have done in the Sparkle block), you need to set it equal to something - this is called initialisation.
-
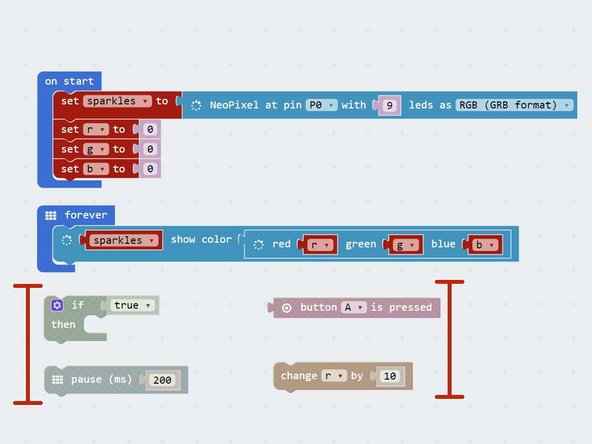
Pull in three set blocks like the picture to initialise r,g, and b, in on start.
-
Set them equal to some different numbers - try it out and see what colours you get!
-
-
-
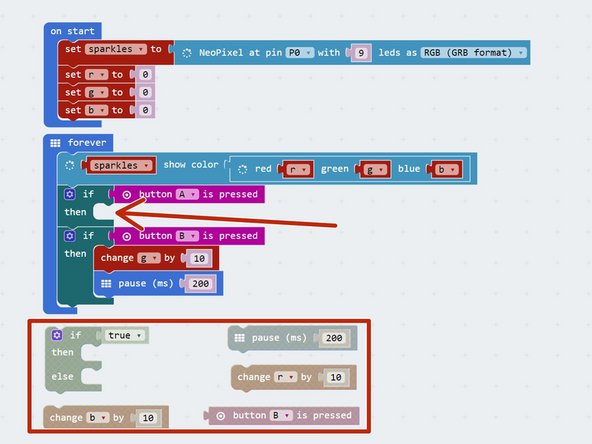
Now let's add some blocks to let us change the colour of the Sparkles using a button.
-
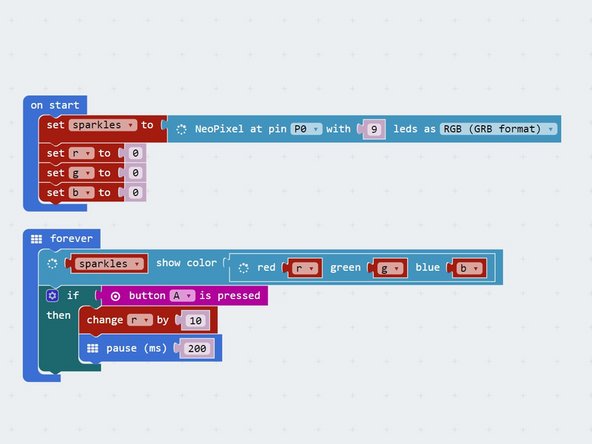
Inside the forever loop, add an If block that checks if button A is pressed.
-
If it is, change the r variable by 10.
-
Add a pause block of 200 milliseconds after r is increased. Otherwise, holding down the button will change r very quickly!
-
At the start of the program, set r, g and b to 0 again so you can see what is happening more clearly when testing your program.
-
In the picture are the blocks you need if you want a hint!
-
-
-
You probably noticed when testing your program that if you press the button enough times, the amount of red seems to start from zero again.
-
This is because the amount of red, green and blue in a Sparkle cannot be more than 255!
-
When r is more than 255 (when you have pressed the button more than 25 times), the Sparkle will show the value of r minus 255.
-
For example - 260 is more than 255, so the Sparkle will actually show 260-255=5!
-
-
-
We can now change the amount of red, but we want a colour mixer! Let's add another colour using the other switch.
-
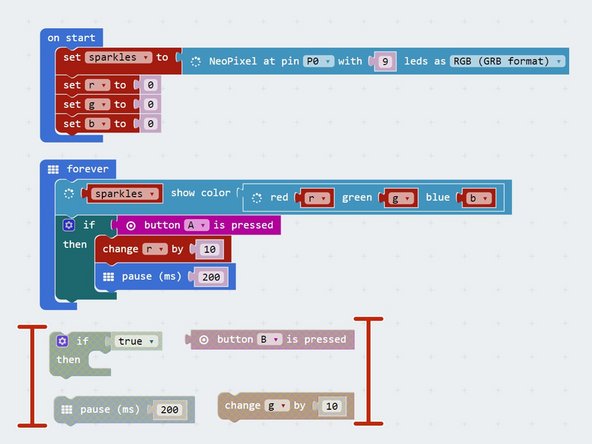
Add another If block in the forever loop, that checks the second button (B) and increases g by 10 if it is pressed.
-
Don't forget to use another pause block!
-
There is another hint of the blocks required in the picture if you need some help.
-
Make sure to test your program properly before moving on. What do you notice when you add equal amounts of red and green?
-
-
-
You may have noticed that we have run out of buttons for the third colour, blue - but there is a solution!
-
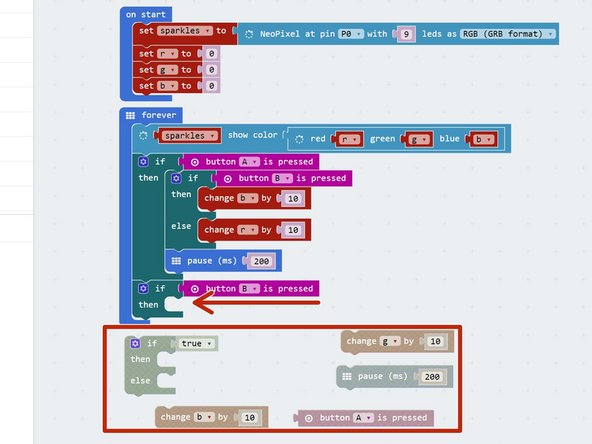
What if we made a program that could increase b by 10 if both buttons are pressed at the same time?
-
To do this, inside the If block that checks button A, put an If/else block that checks button B.
-
If button B is pressed as well, increase b by 10 instead.
-
Else, just increase r by 10 as before.
-
Don't forget to wait 200 milliseconds!
-
There are some more hint blocks in the picture if you need them!
-
-
-
You've probably found the last program doesn't quite work correctly - if you press both buttons, the blue and green both increase!
-
This is because the second If block is still true if we are holding down both buttons, so g is also increased by 10.
-
Add an If/else block inside the second If block just like the one inside the first If block to fix this.
-
Have a look at the hint if you need to.
-
Congratulations - you have made a switch controlled colour mixer!
-
-
-
When r, g and b are all the same, the Sparkles will be white.
-
Add blocks to your program to:
-
Check if r, g and b are all the same (hint: you will need 3 If blocks inside each other, or you can use AND from the logic menu)
-
If they are, sound the buzzer!
-
You will also need to add the buzzer module.
-


Team
