
Introduction
Using a switch input and an IF block, make your own Morse Code machine to transmit any letter you like.
-
-
So far, we have only used outputs - things that the micro:bit can change to 0 or 1.
-
Inputs work in a similar, but opposite way - they can send a 1 or 0 signal back to the micro:bit!
-
Our program then needs to decide what to do, depending on whether the signal is 0 or 1.
-
The switch module is a great example of an input - when one of the switches is pressed, the pin it is connected to will change to 1.
-
-
-
Assemble your robot like the picture. The connections should be:
-
Buzzer - P0
-
Switch - P1
-
Green LED - P2
-
Red LED - P8
-
-
-
Using inputs is slightly more complicated - the micro:bit needs to make a decision on what to do, based on the input.
-
We can make decisions easily using a IF block.
-
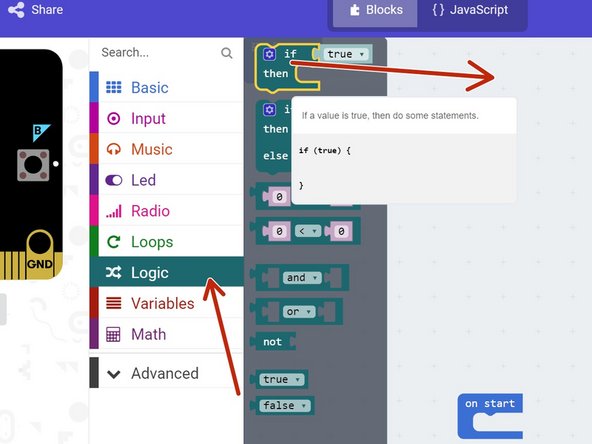
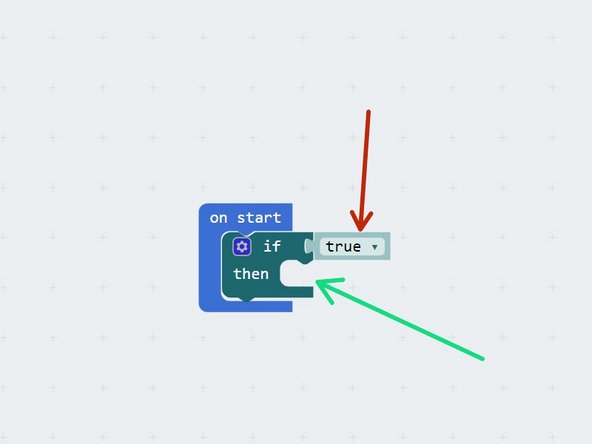
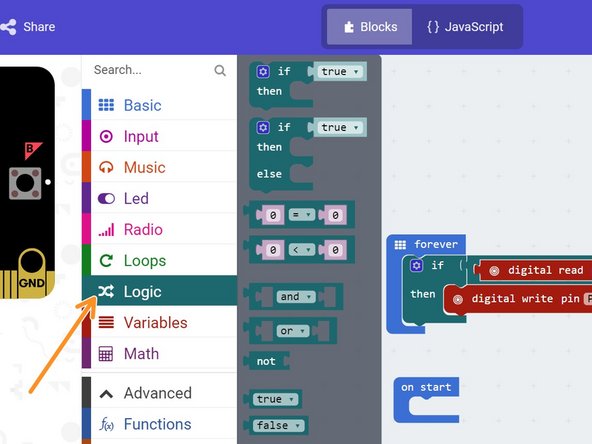
Drag in an If block to a new program - you will find it in the Logic menu.
-
-
-
If blocks have two parts:
-
Condition - this is the block you put at the start of the IF block. The condition can be either true or false
-
Conclusion - this is just some blocks of code that are only run if the condition is true - if the condition is false, they are skipped!
-
You're a bit like a computer that can use your own 'IF' blocks every day! For example, IF the bell rings, THEN the lesson is over.
-
Can you think of any more examples of IF blocks you use in real life?
-
-
-
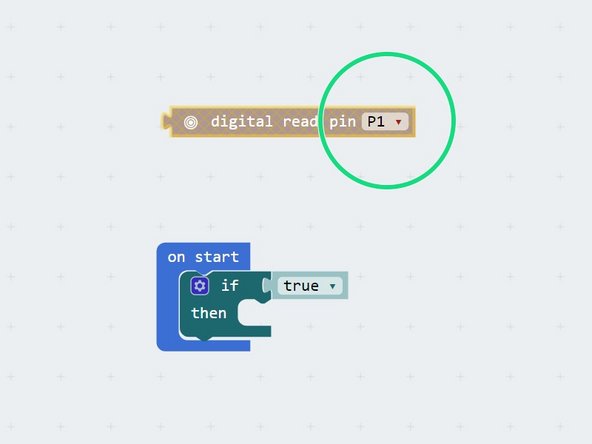
To use the switch input in the If block, we use a digital read block, that will tell us if a pin is 0 or 1. Drag one into the program from the pins menu.
-
Change it so that it checks P1, which is attached to the switch.
-
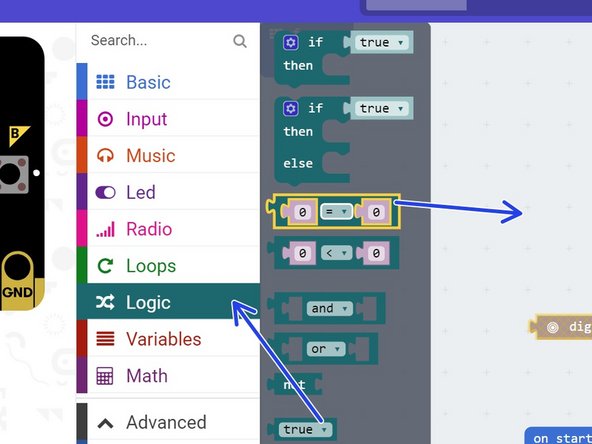
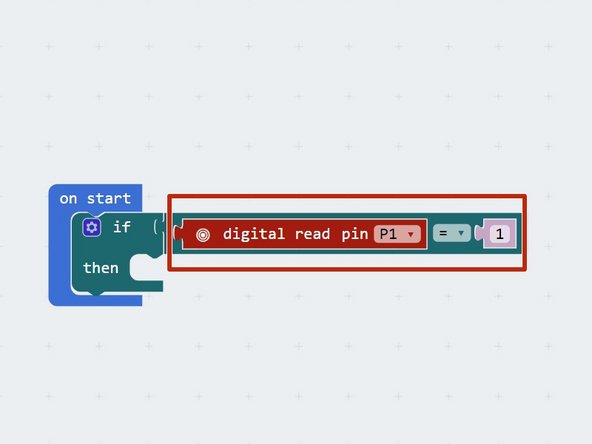
We need to check if the digital read of P1 is equal to 1. From the logic menu, drag an = block into the program.
-
-
-
Put the equals block into the condition of the if block, and drag in the digital read block as well, so the condition checks if digital read P1 = 1
-
Our if block now checks if the switch is pressed!
-
N.B. You always need to drag in a comparison block (like the 'equals' one we've used here) as well as then dragging in another block (like the 'digital read') into this comparison block
-
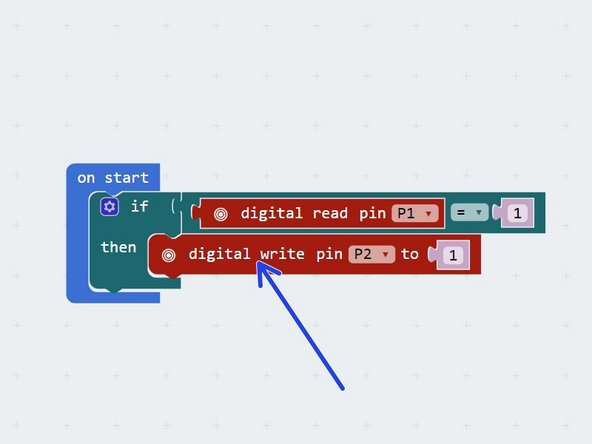
Add a digital write block to the conclusion of the if block, to turn on an LED if the switch is pressed.
-
Download your program, and send it to the micro:bit.
-
Hold down the switch whilst you power on the micro:bit. Your LED should light up! What happens if you don't hold down the switch? Will it light up if you press the switch after turning on the power?
-
-
-
You would expect the previous program to turn on the LED when you press the switch.
-
You should have found that it only works if you hold the switch down when you upload the code, or hold it down and turn the robot off and on again.
-
What's wrong? Let's think through the program:
-
Start program
-
If digital read P1 = 1, digital write P2 1
-
End program
-
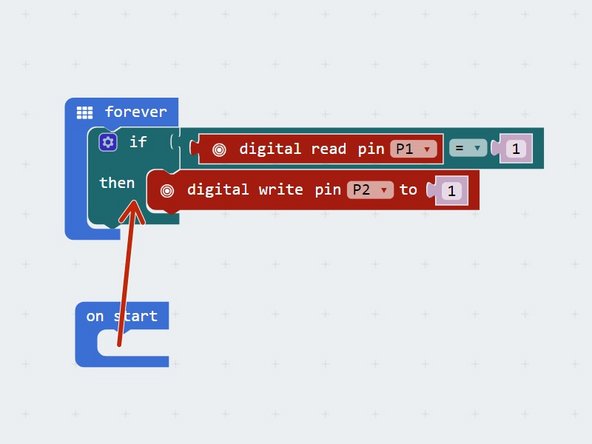
Our robot only checks the switch once, then stops! We need to make sure it keeps checking, forever.
-
Move the if block into the forever block instead of on start, and check everything now works properly.
-
-
-
IF blocks are part of a family of blocks called conditionals - you can find them all in the logic menu. Have a look through and see if you can guess what some of them do!
-
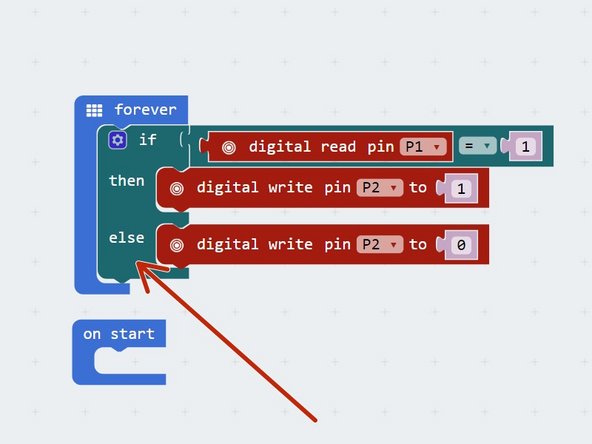
We're going to have a look at one more conditional, the IF/ELSE block.
-
IF/ELSE blocks start the same way as an IF block, but have another bit on the end - the ELSE part!
-
If the condition is true, the IF conclusion is run and the ELSE conclusion is ignored.
-
If the condition is false, the IF conclusion is ignored and the ELSE conclusion is run!
-
Have a go at building the example in the picture - before you program the robot, can you guess what it will do? Don't forget to put it in the forever loop!
-
-
-
You may have noticed we have actually made our own Morse Code machine already!
-
By holding down the switch for a long time you can send a dash, and a short press would send a dot.
-
For this challenge, add some more blocks so that:
-
When the switch is pressed, the green LED and buzzer are on
-
When the switch isn't pressed, only the red LED is on.
-
-
-
Time for a harder challenge!
-
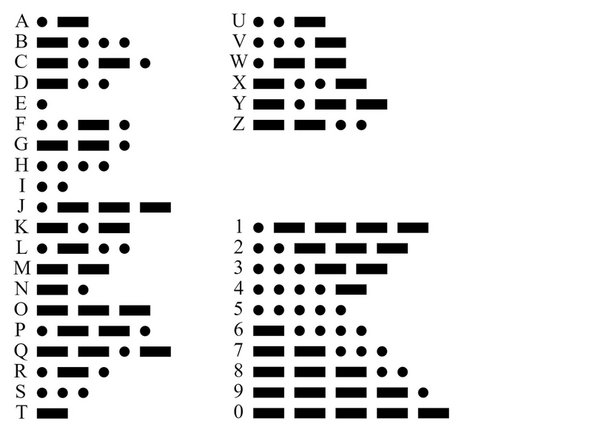
Using the Morse Code card in the second picture, can you send a secret message to your neighbour?
-
You can click on the picture for a larger version.
-
Get them to decode it and see what they come up with - no speaking allowed!
-
-
-
A super hard challenge now - can you write a program that sends Morse Code for your initials (or even your whole name) automatically, but only when you press the button?
-
If you're feeling really clever, try and use some loops to reduce the length of your program if you need to send lots of dots or dashes in a row.
-


Team
