
Introduction
One of your tasks on the mission is to secure the planet for mankind - learn how to speed up your programs to get our robot to patrol the planet surface.
-
-
Make sure your robot is setup in the same way as the previous sections!
-
You don't need the magnet module for this section.
-
-
-
For the rest of this lesson, we need to be able to make the robot turn accurately.
-
Build the program in the picture, and try it out on the robot - it should turn a small amount, then stop.
-
For the next few steps, we need to make out robot turn exactly 90 degrees - adjust the length of the pause block until your robot accurately turns 90 degrees.
-
You won't be able to complete the next steps until your robot turns accurately - get your teacher to check before you move on!
-
-
-
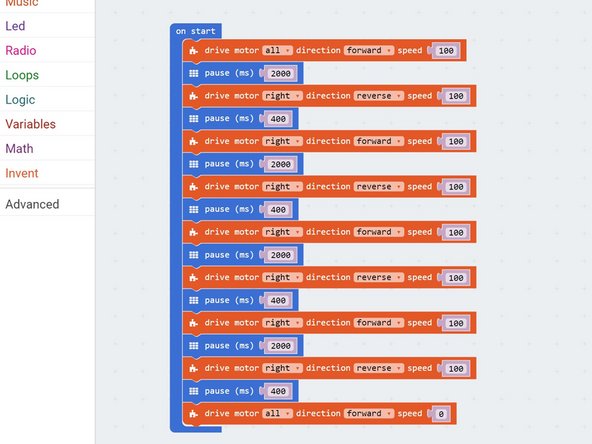
Now you can turn by 90 degrees, write a program that makes your robot move in a square!
-
It should like something like the example in the picture, but your 'pause' blocks will be different.
-
If you think about it, you only need to reverse 1 motor and then set it to forwards again to change direction - one motor can be going forward all the time.
-
Also, you don't necessarily need to stop after turning - just set the motor going in reverse to go forward again!
-
-
-
Making that last program took a while - and the robot was just doing the same things over and over again.
-
Say we wanted to drive in a square 10 times - that would take ages to program!
-
Driving in a square was doing the same thing 4 times:
-
Drive forward
-
Pause
-
Turn
-
Pause
-
We can use a loop to get the computer to repeat these steps for us!
-
-
-
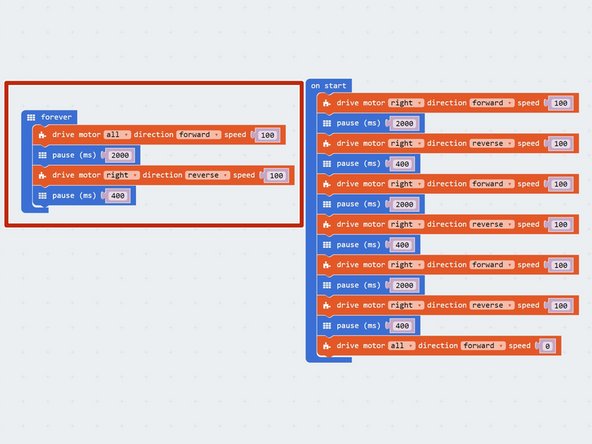
One of the most useful loops is the forever loop - we have this block in every program, next to the 'on start' block - we just haven't used it yet!
-
Anything inside this loop is just repeated forever.
-
Let's use this to make our robot move in a square forever.
-
Move some blocks into the forever block, to make the robot drive forwards, then turn 90 degrees, like in the picture.
-
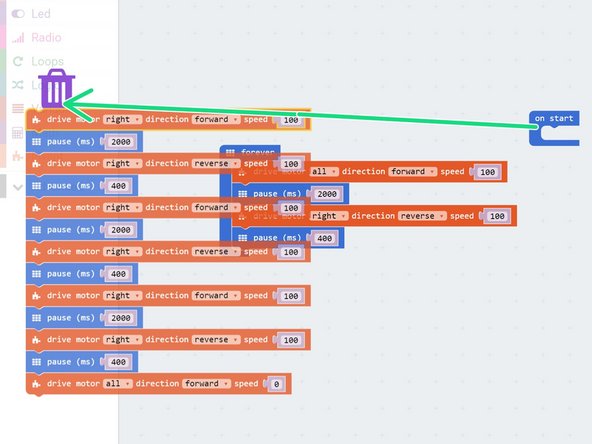
Delete the rest of the code in the on start block by dragging it into the left menu - we don't need this anymore.
-
Upload the code to your robot - it should move in a square forever!
-
-
-
What if we don't want to move in a square forever?
-
Luckily, there are other types of loops we can use that can loop things in different ways.
-
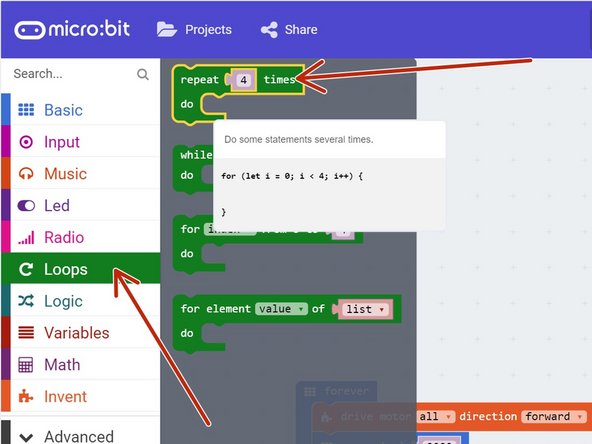
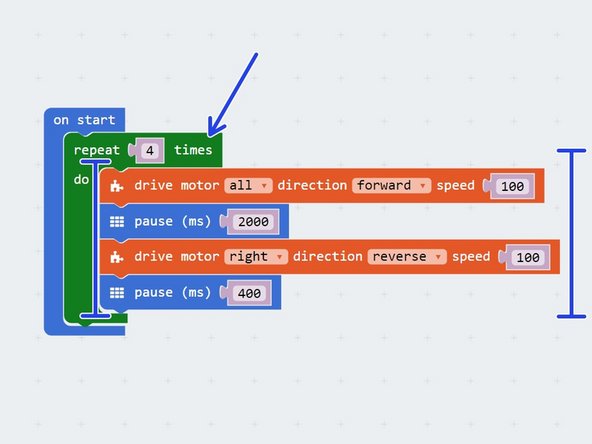
Click on the Loops menu, and drag in a repeat 4 times loop. This block will repeat any code inside it, but only the number of times that you tell it to!
-
Put the new loop block into the on start block, and move the other code from the forever loop into the new repeat 4 times loop, like the picture.
-
Now your robot should move in a square once, then stop!
-
-
-
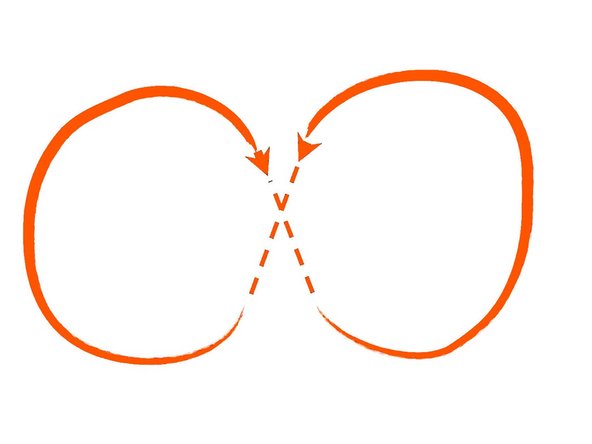
Now your robot can drive in a square using a loop, let's change the code so it will drive in a figure of 8.
-
Have a look at the picture if you don't know what a figure of 8 is.
-
Try to split the shape up into 2 sections, and use a do _ times loop to reduce the length of your sequence.
-


Team
