
Introduction
Learn how to use the Python editor to make programs for the robot!
-
-
Welcome to the the Invent! micro:bit Python course.
-
Before you can start learning to code, we need to know how to create and upload programs to the BBC micro:bit that powers your robot.
-
To get started, build up your robot like in the picture.
-
At all times, make sure the left motor is plugged into M1, and the right motor is plugged into M2!
-
-
-
We're going to be using a web based Python editor to write programs for the micro:bit - head to this link to download it, and save the file to your memory stick.
-
Unzip the file, and click on the editor.html file to load the editor. Make sure this is saved to your computer - ask your teacher where you should save it.
-
Delete all of the code already in the editor to leave a blank screen.
-
-
-
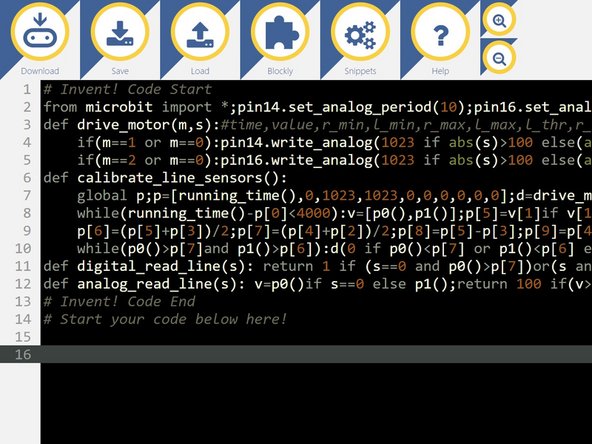
We've made some starter code, that makes the motors and some other modules much easier to use - you will need to include this in every program you make.
-
Download the starter code python file from here: Get the Starter Code!
-
Save the file to your memory stick so you always have a copy.
-
Let's start a test program by copying all of the starter code into the editor. It should look like the picture!
-
If you've done any Python before, you might notice that this code doesn't look very good, and isn't laid out very well - hopefully your code will never look like this! It has been deliberately condensed to make it as small as possible, so it doesn't take up too much space on your screen.
-
-
-
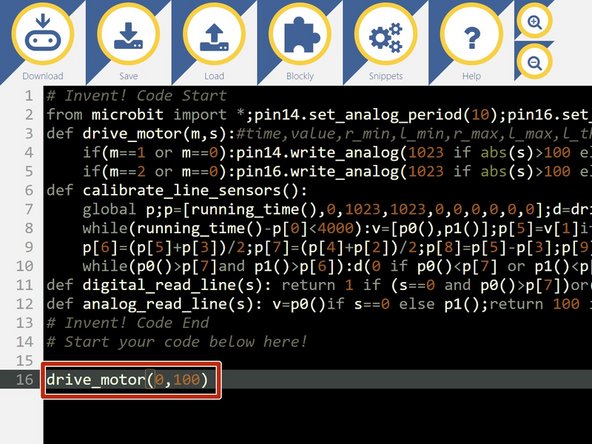
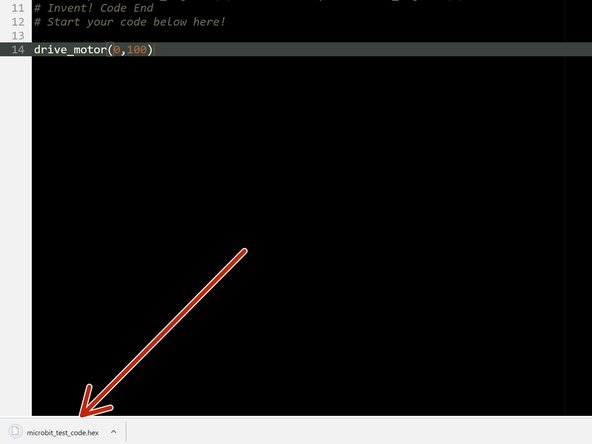
Always start your programs after the line that says Start you code below here!
-
Add the line drive_motor(0,100) at the end of the program. This makes both motors drive forwards at 100%.
-
-
-
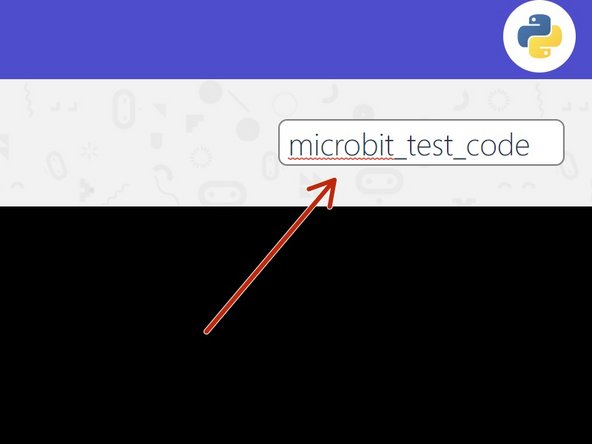
It's always important to name your program, so you know what it does later!
-
In the box in the top right of the window, name your program microbit_test_code like in the picture
-
-
-
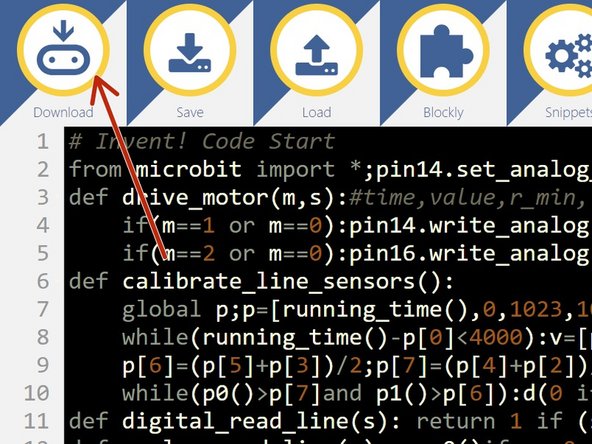
Finally we need to download the program, so we can send it to the micro:bit.
-
Click the Download button in the top left - this will save the program to your Downloads folder.
-
-
-
The file we just downloaded is a HEX file - this is what we need to send to the micro:bit to make the program run.
-
Plug in your micro:bit with the USB cable.
-
If this is the first time the micro:bit has been plugged in, the computer might do some setup - once its finished, the micro:bit should appear like a USB drive.
-
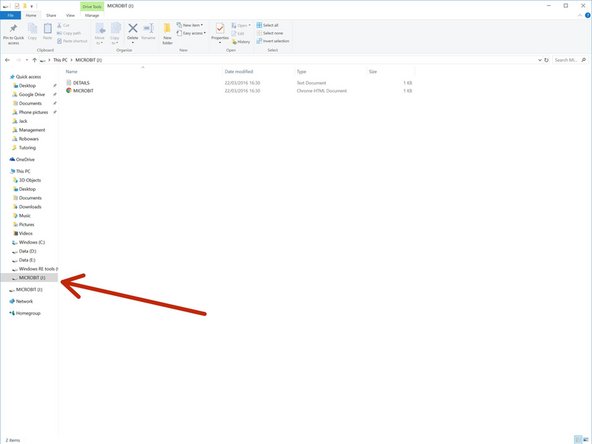
Open up the File Explorer, and click on the MICROBIT drive that has appeared. It should look like the picture.
-
-
-
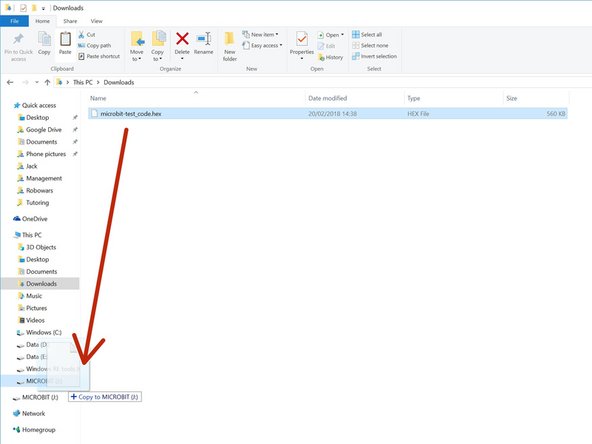
All we need to do is copy the HEX file to the MICROBIT drive!
-
Go to the Downloads folder, and drag the microbit_test_code.hex file onto the MICROBIT drive.
-
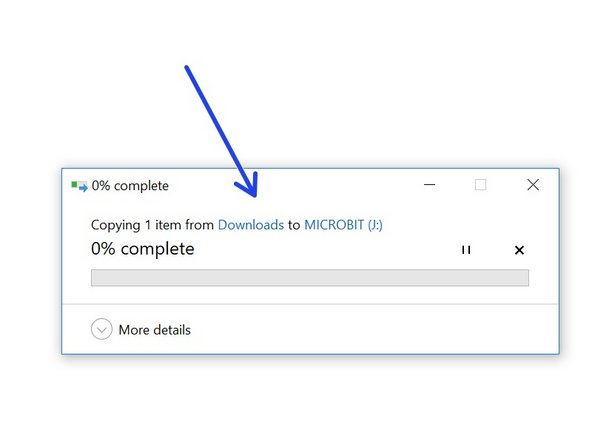
Wait for it to copy, and that's it!
-
Unplug the USB cable and turn on the power switch on the circuit board to start the program.
-
The program will run automatically - make sure your robot doesn't run off the table
-
-
-
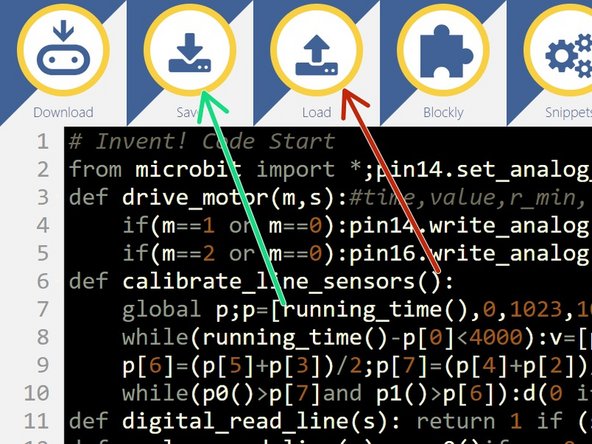
Don't forget, everything you do is only saved in the browser, and in any HEX files you download!
-
Just in case, it's a good idea to save any important files that you might want again later to your memory stick.
-
Try it now - click the save button to download a .py (Python) file, which you can save to your memory stick.
-
You can then load these files in the editor later to get your code back.
-
We're all done! Head onto the next section to make a start on the first section.
-


Team
