
Introduction
Use the Grove OLED and Barometer modules to create your own wireless weather station!
-
-
In this project, we'll be using the BMP280, which is a small barometer which can read out the current air pressure as well as the temperature.
-
In weather, air pressure is super useful to know as it can predict a variety of weather phenomenon like big storms!
-
If you're curious (and brave!) this is the full datasheet for the BMP280. It's very technical, but don't worry, we've done the work for you!
-
-
-
In the MakeCode editor, click the settings icon and select "Extensions".
-
Search for "BMP280" - the name of the barometer module, and click the highlighted extension.
-
You'll know it's worked if you see a new barometer section on the sidebar!
-
We need this extension to interact with the BMP280!
-
-
-
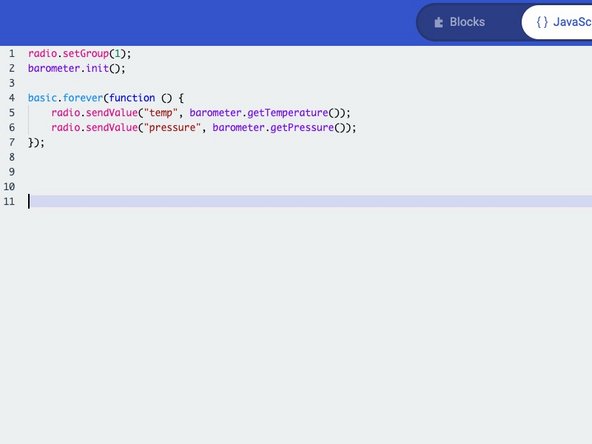
We'll be using the micro:bit's internal radio to communicate between the station and the receiver, hence the
radionamespace. -
Make sure the radio's group is set to 1 and that the barometer is initialised! If you forget either of these lines your transmitter may not work!
-
The code here simply sends the current temperature and pressure over the radio to our receiver. We use the
sendValuefunction to associate each value with its appropriate measurement. -
We've used the BMP280's internal thermometer, however you could use the micro:bit's thermometer as well.
-
-
-
Take the micro:bit board off of the mounting frame.
-
Attach the barometer module to the header labelled "I2C P19"
-
It's important we use the "I2C" header, as this allows us to use a more complex communication method with the barometer module. If we used another header, we wouldn't get any feedback at all!
-
-
-
Now that our transmitter is built, we need to make our receiver!
-
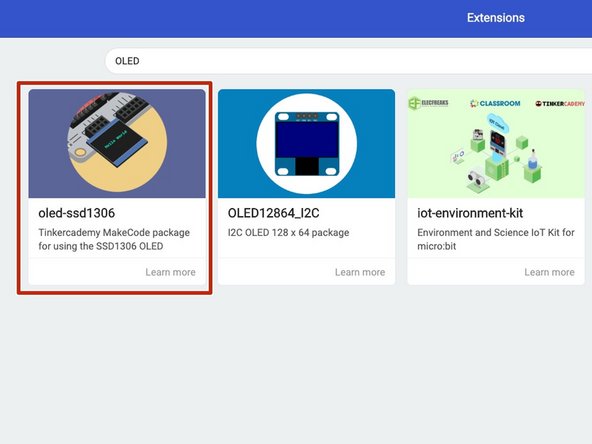
We'll be using an OLED screen to display the readings from our station. It's a low power display which can also be found in high-end phones and televisions!
-
Create a new project, and this time search for "OLED" in the search box. Install the oled-ssd1306 extension.
-
-
-
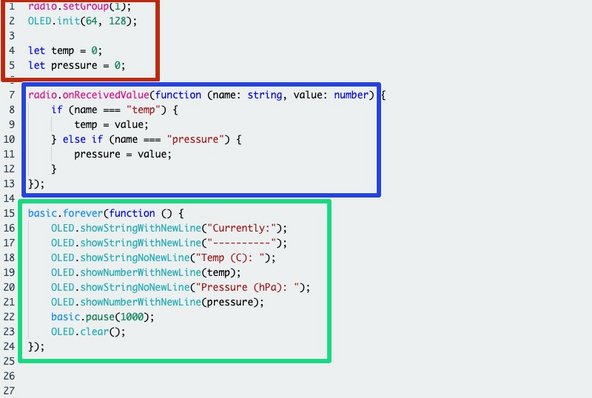
The code here is a little more complex. First we initialise the radio and OLED screen and define two variables to hold the current readings.
-
Next we write code to handle the incoming data to the micro:bit. If the value is a temperature reading we write it to
temp, andpressureif it's a pressure reading. -
Finally we display the readings on our screen and update the display every second.
-
-
-
Like before, attach the OLED module to the I2C header on the second micro:bit.
-
-
-
Put your weather station outside and turn it on.
-
Now turn on your receiver. You should see the screen displaying the current outside temperature and pressure!
-
-
-
Paul, the person who wrote this guide, is American, and therefore unable to understand Celsius! Can you add a row below the temperature reading that shows the current temperature in Farhenheit?
-
The formula to convert Celsius to Fahrenheit is temp * 1.8 + 32.
-


Team
