
Introduction
Build a wireless sonar system with a display!
-
-
Grab one of your servo bags, which should look like the image on the left.
-
From your bag, take out:
-
The servo unit
-
Two of the small bolts and nuts
-
The rectangular mounting frame
-
-
-
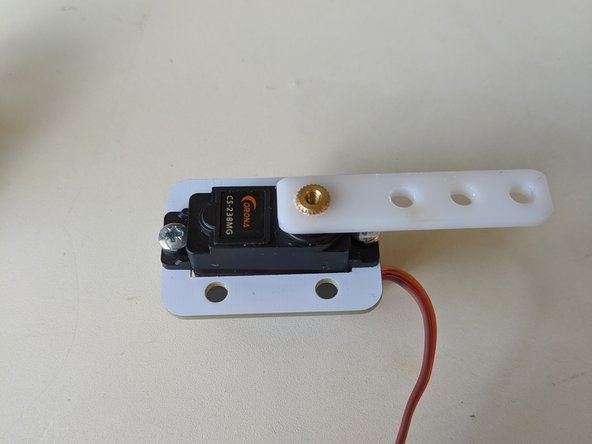
Slide the rectangular frame onto the servo from the bottom (where the wires come out of the unit)
-
Use the two small nuts and bolts to attach the frame to look like the image.
-
Avoid over-tightening the bolts as this may cause the frame to flex or even snap!
-
-
-
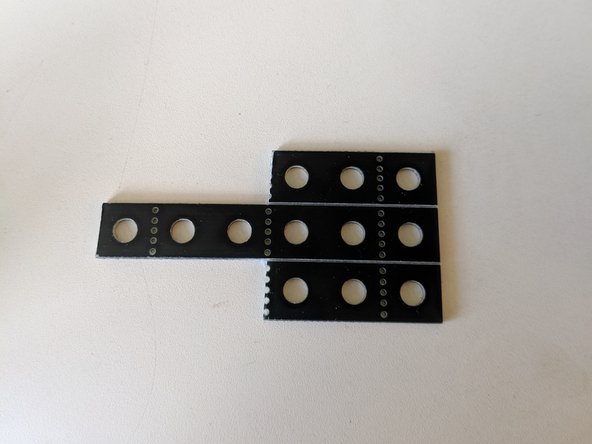
Using your construction kit and a pair of side-cutters, cut the following shape out of your beams. This will serve as the platform for the ultrasonic sensor.
-
Mount your ultrasonic sensor to the platform, aligning the three legs with the holes in the platform.
-
Your ultrasonic sensor uses sonar to measure the distance to objects in front of it, which is similar to the echolocation bats use to find food in the dark.
-
-
-
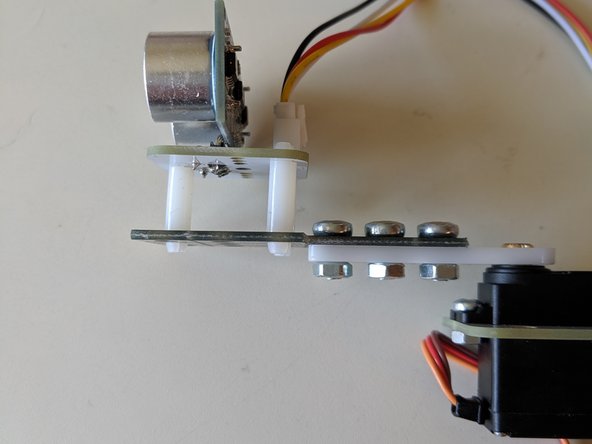
Slide the plastic beam from your servo back onto the gold cog on the servo.
-
Ensure that when you push the beam left and right, it stops at the same angle from the servo. We need 0 degrees to be fully left and 180 degrees to be fully right or else it won't work! Readjust your beam if not.
-
Using three standard size nuts and bolts from your construction kit, attach the ultrasonic sensor to the plastic beam.
-
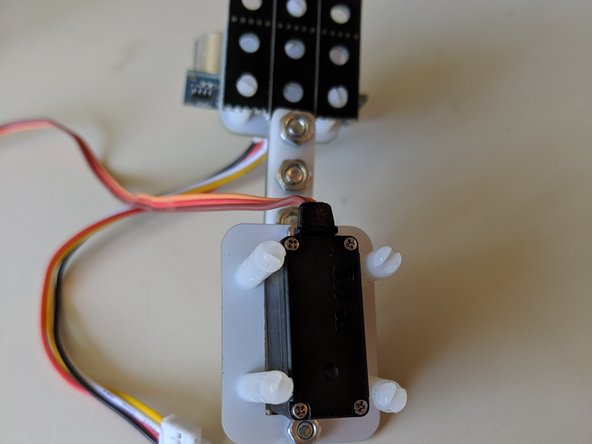
Insert the four large plastic legs from your servo bag into the holes of the mounting frame, and then your unit is complete!
-
-
-
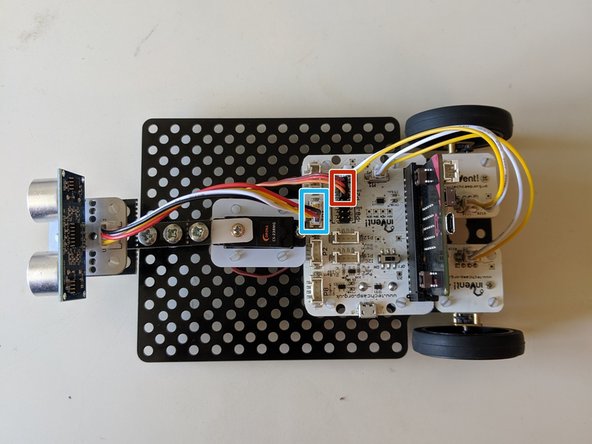
Using the standard mounting frame, build up your robot like in the image.
-
Attach the servo to the three servo pins labelled P0 (there should be an arrow pointing to them)
-
Connect the ultrasonic sensor to the pins labelled P1.
-
You don't need to keep the wheels and trackball on the board, however it will make your board ready for the next project.
-
-
-
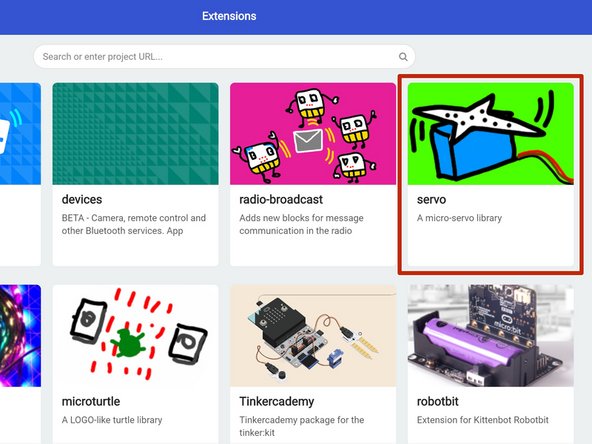
Like before, go to the extensions page on MakeCode
-
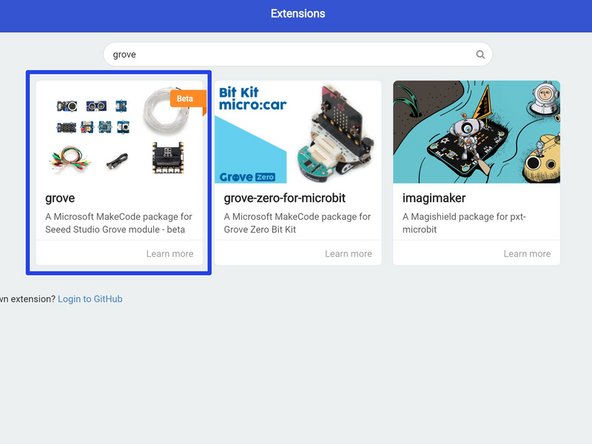
On this page, install:
-
The servo extension
-
The grove extension
-
-
-
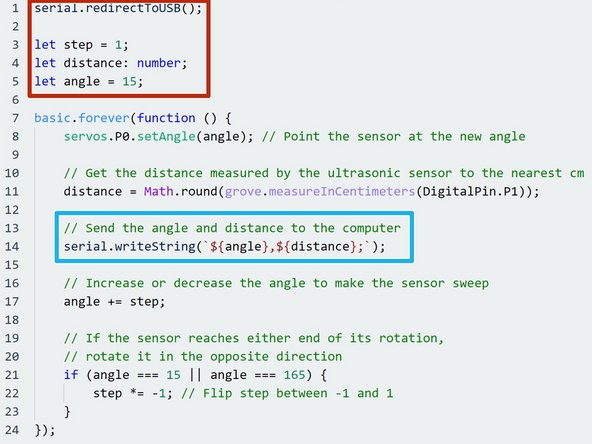
Enter the following code into the MakeCode editor and download to your micro:bit. Can you work out how it works?
-
Here we initialise the connection of the micro:bit to your computer so that it can send data, as well as creating three variables we'll need later.
-
Here we send the data from the ultrasonic sensor to the computer in the format "<angle>,<distance>;", which is what the sonar display program expects.
-
The blue box uses a feature of JavaScript called template literals, which work like normal strings except that we can write the values of variables into them using ${<variable>}. They're defined with `` instead of "" like normal strings.
-
-
-
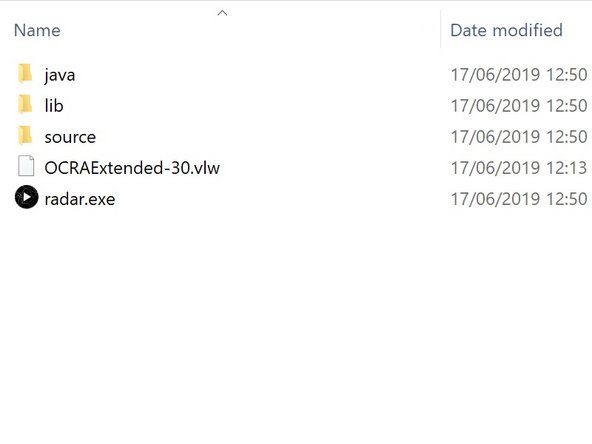
Grab the program from this link
-
Connect your micro:bit to your computer and turn on the power switch. The ultrasonic sensor should start turning.
-
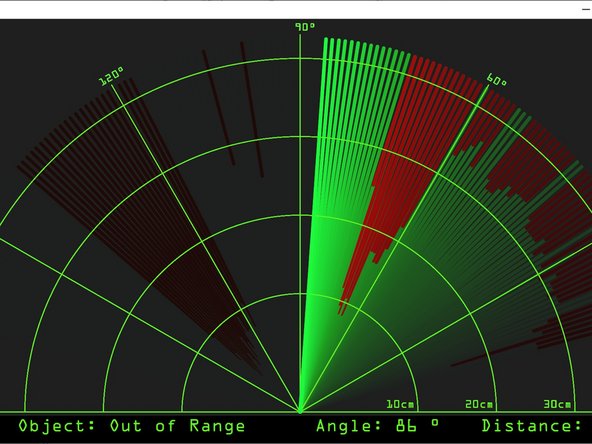
Run the radar.exe file. If all is working you should see a display of the ultrasonic sensor as it rotates. If the line is red, it means it's detected an object, and the point where the line stops tells you how far away the object is from the sensor.
-
-
-
The display is cool, but wouldn't it be cooler if you could put the sonar unit away from the computer?
-
See if you can develop a system using the radio module where the sonar unit sends the signal to another micro:bit connected to your computer to make a wireless sonar system.
-
Hint: the receiver micro:bit should receive the data string from the sonar unit and send it over serial to the computer.
-


Team
