
Introduction
There's a gap in the track! We need to make our robot even more intelligent so it won't get stuck, and can find the track again on its own.
-
-
We only need the line follower module for this lesson - assemble your robot like the picture!
-
-
-
Dealing with breaks in the track is difficult. We can't just drive forward for 1 second using a sleep, as we won't be able to sense the line at the same time.
-
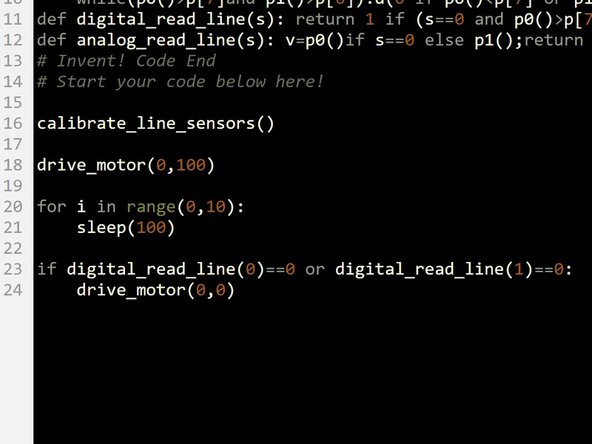
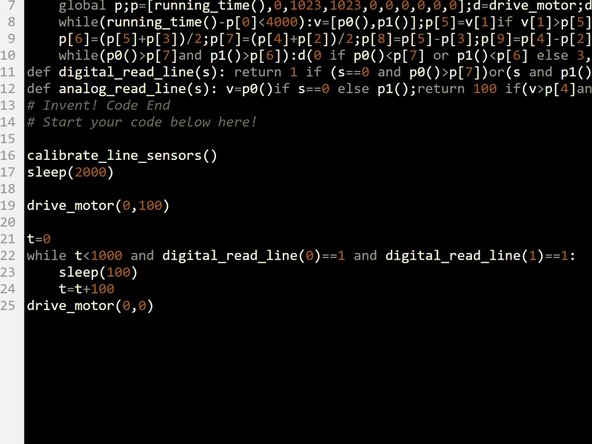
Build the test program in the picture.
-
It would be great if this program drove forwards and then stopped on the line - try it, see what happens.
-
It only works if one of the sensors is exactly on the line after 1 second - this is not very likely!
-
This is because the sleep stops anything else from happening whilst it is waiting for 1 second - so all the time we are driving forwards, we can't check the sensors - that's no good!
-
Things that stop other things from happening are called 'blocking' - they block everything else until they are finished.
-
-
-
We need to come up with a way to wait whilst still being able to do other things.
-
Replace the sleep(1000) line with a for loop that runs 10 times, with a sleep(100) line inside it.
-
This code will wait for 1 second, just like before.
-
-
-
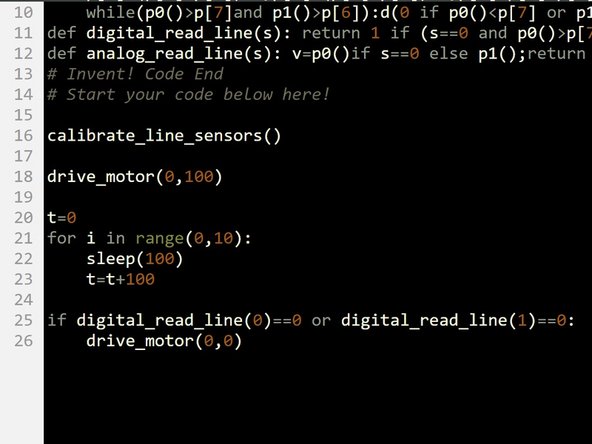
We now need to add a variable that acts as a counter - it will count how many milliseconds of delay have happened.
-
Above the for loop, make a new variable called t and set it equal to 0.
-
Inside the loop, increase t by 100
-
t will now count the number of milliseconds of wait time!
-
If you're feeling clever, you can change the for loop to do this without even creating another variable, and using i to track the amount of time instead......
-
-
-
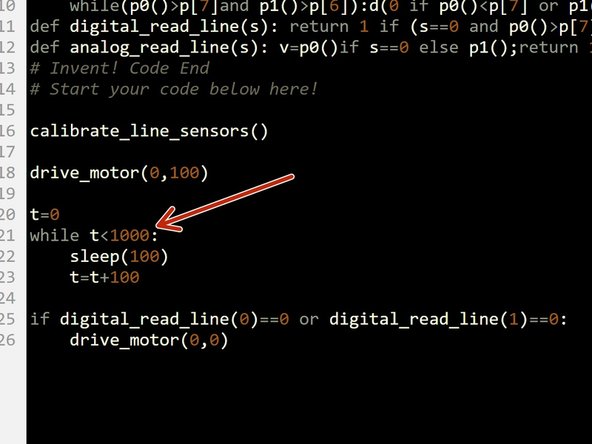
Now let's use the counter to control the number of times the loop runs.
-
Instead of the for loop, replace it with a while loop.
-
For the condition, run the loop while t<1000.
-
We can now change this number to decide how long the wait is! For example, changing to t<2000 would run the loop for a total of 2000 milliseconds (2 seconds).
-
-
-
What's the point of making a really complicated delay?
-
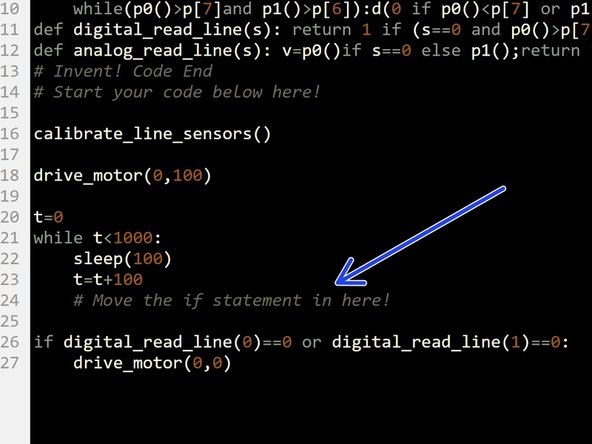
Anything we put in the loop will be run as the delay is happening - so we can check the sensors whilst we are driving forwards!
-
Move the IF statement checking the sensors inside the loop.
-
You will need to add in a sleep(2000) line after the calibration - the robot always finishes on the line after calibration, so otherwise we won't be able to test our code.
-
Try it out - the robot should now drive forward and stop exactly on the line, every time!
-
Experiment with changing the length of the wait loop, so the robot can start further away from the line and still reach it.
-
-
-
We actually don't need the IF statement in the loop - we can merge the conditions of the loop and the IF statement together!
-
Let's think about this - we want to run the loop (and the the motors) if:
-
t<2000, AND
-
Sensor A is HIGH, AND
-
Sensor B is HIGH
-
Luckily, we can use 2 AND operators together to do this! Change your code to look like the picture, and test it out.
-
-
-
Let's merge our code with the 2 sensor line follower program to deal with simple breaks in the track.
-
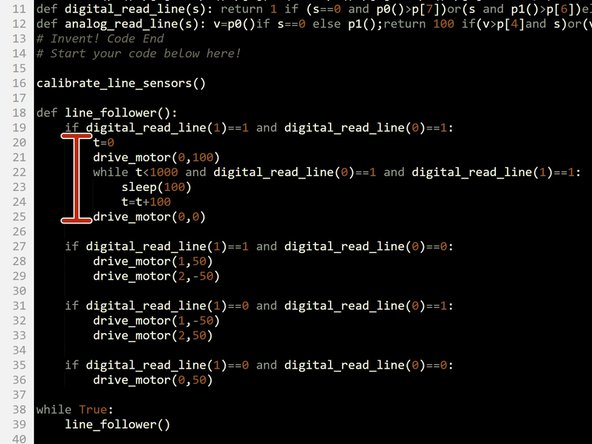
Load up your code and add the line finder code you just wrote to the IF statement where both sensors are off the track (1).
-
It should look like the picture!
-
-
-
We need to make a few changes to make our code work with the line follower:
-
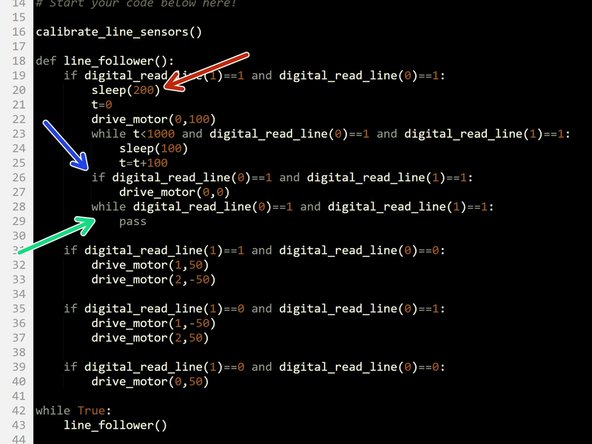
Add a delay of 200 milliseconds before the while loop (this makes sure both sensors are not on the line)
-
We only want to stop the motors if both sensors are still off the track after the wait loop.
-
Put the motor stop line in an if statement, that checks if both sensors are still 1
-
After we have stopped the motors, we then want to wait until 1 of the sensors is 0 before we continue
-
Add another while loop to do this!
-
-
-
Cover a small section of straight track (about 5cm) with a piece of paper, or white PVC tape and tape it down to test the program.
-
You will probably need to make adjustments to speeds and timings to make it work reliably!
-
Keep experimenting until it works well.
-
Make sure the gap is on a straight section of track - this code won't work on gaps in curves! Can you work out why?
-
-
-
Once you can cross a gap in straight track, try a gap in curved track!
-
To do this, you will need to make the robot move side to side in the wait loop, instead of just moving forwards.
-
This can be done by making the robot turn to start with instead of going forwards, and then changing the direction of turn inside the loop every so often.
-
It works best if the robot goes left and right several times , in a kind of sweeping motion.
-
You can also experiment with other types of break like in the picture - offset lines and breaks that point the robot in the wrong direction like the middle example are particularly difficult to get right!
-


Team
