
Introduction
1 line sensor is great, but we can't follow a complicated path - using two sensors however lets us do much more complex things!
-
-
Assemble your robot like the last section.
-
Plug the left sensor into P1, and the right sensor into P0
-
-
-
Let's test both sensors so we know how they work.
-
Build the test program in the picture - can you guess what it will do?
-
On the other side of your activity mat, program your robot and slowly move the line sensor side to side across one of the lines.
-
Don't forget, you need to use this calibration block every time you use the line sensor, and place the robot on the black line when you first turn it on.
-
What happens to the motors? Does it do what you expected?
-
-
-
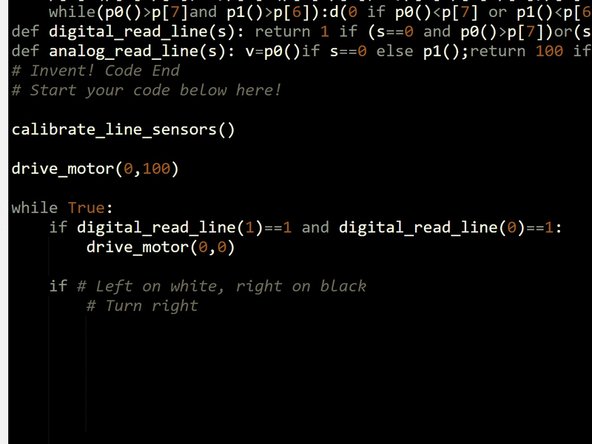
We need to write a program using the two sensors that follows the black track.
-
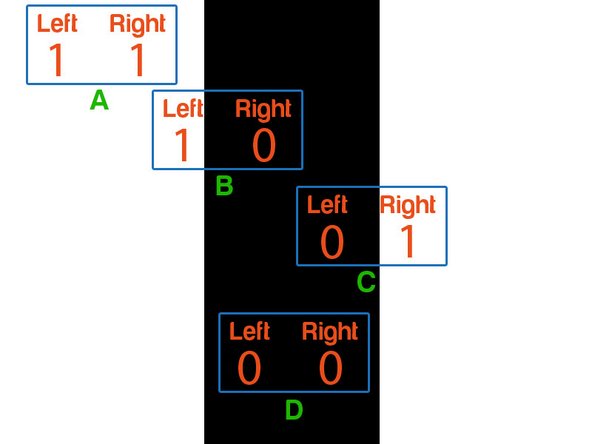
Let's consider each of the possibilities in turn, as shown in the diagram:
-
A - Off the track completely - both sensors 1
-
B - Slightly off to the left of the track - left sensor 1, right sensor 0
-
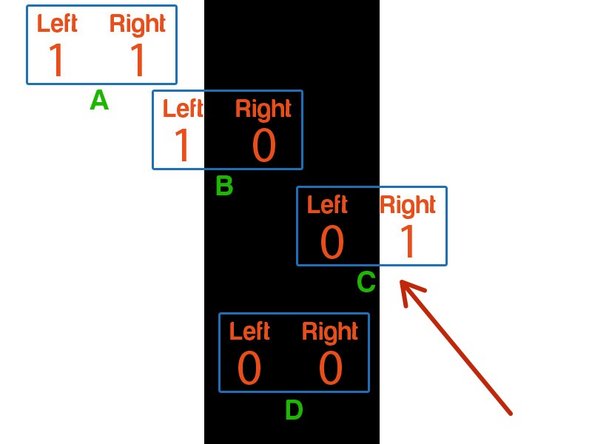
C - Slightly off to the right of the track - left sensor 0, right sensor 1
-
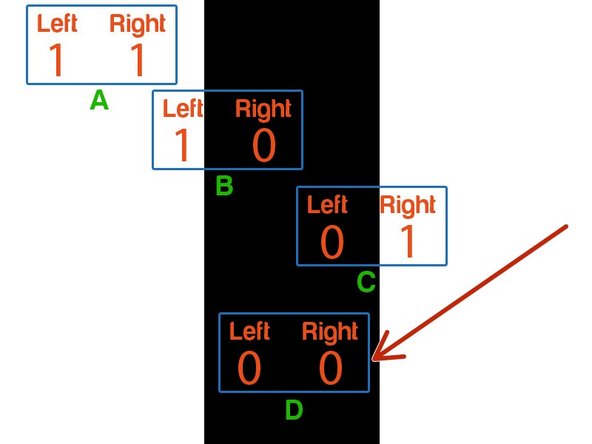
D - on the track, both sensors 0
-
-
-
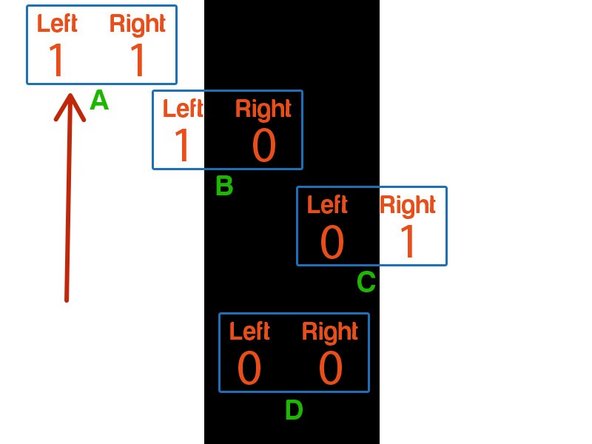
For case A, if the robot goes off the track we need to make it stop so it doesn't drive off forever!
-
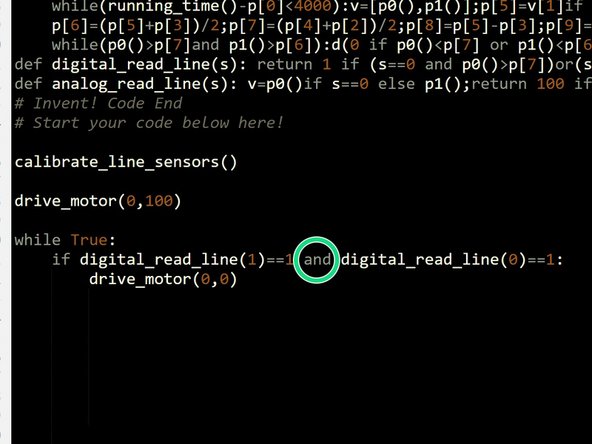
Start your line following program by building the program in the picture.
-
We need to check if A is 1 AND if B is 1 at the same time - we can do this with the and operator, which we used in a previous lesson!
-
-
-
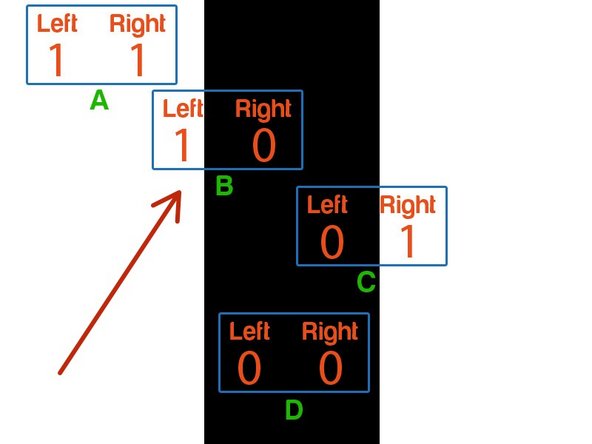
For case B, we are slightly too far left, so we need to turn right to get back on the line.
-
Add some more code to check the sensors, and turn right if we are slightly to the left of the track.
-
There is a layout hint in the picture!
-
Start by having your motors going slowly (say 50) to make sure it says on the track - we'll work on making it faster later.
-
-
-
For case C, we are too far right, so need to turn left to get back on the track.
-
Add some more code to your program to check the sensors and turn left if we need to!
-
There is another layout hint if you need it.
-
-
-
Finally, we need to check for case D - both sensors are 0 so we are on the track, and just need to go forwards.
-
And some more code to your program to complete it, and test your robot on the track.
-
It should be able to make it all the way around on its own!
-
If you're robot keeps coming off the track, try increasing the amount it turns, or adding a small wait after the turn to make it turn even more.
-
-
-
Currently, if the robot goes off the path completely (or the path ends) it just stops.
-
It would be more useful if the robot tried to find the path again!
-
Change your program so that instead of stopping, the robot drives so that it might find the path again. You can make this as complex as you like!
-
Some ideas:
-
Reverse in a straight line
-
Drive forwards whilst sweeping left and right
-
Drive in increasing size squares (hard)
-
Drive in an increasing size spiral (v. hard!)
-


Team
