Introduction
Create a digital spirit level using LEDs and a buzzer!
-
-
In your browser, go to https://makecode.microbit.org/. This will load the Microsoft MakeCode editor which we'll be using to write the TypeScript programs for our make:bit.
-
Click the "New Project" button, and the editor will open.
-
On the top bar, click the JavaScript button to leave the block interface and enter the TypeScript environment.
-
-
-
In previous projects, we used Python to develop our micro:bit code. Here, we'll be using a language called TypeScript. But what is TypeScript?
-
TypeScript is a language developed by Microsoft which adds extra features to the popular language JavaScript. If you've ever written JavaScript, the language will look very familiar, and in fact any JavaScript program will run in TypeScript.
-
TypeScript is an incredibly useful language to learn, as it's used everywhere, from major websites to applications such as Spotify and Discord. In fact, TypeScript powers a significant portion of the modern web!
-
-
-
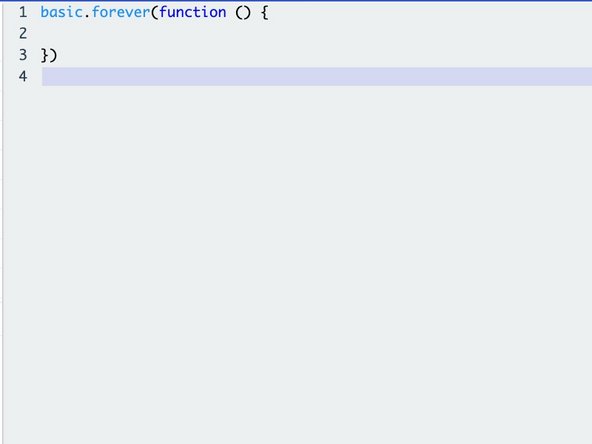
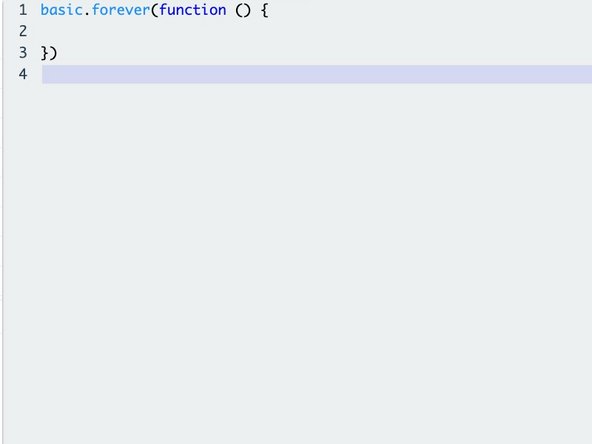
Before we start developing our own TypeScript code, let's start by analysing the starting project template.
-
You may recall in Python to keep your program running forever we used a
while True:infinite loop. Here, we use something similar to define an infinite loop, theforeverfunction. -
Effectively, the forever function lets us define the code between the brackets that we want to run infinitely, just like the
while True:loop in Python. We can start out by writing our code on line 2.
-
-
-
The forever function belongs to the
basicnamespace, which groups the various features of the micro:bit into categories. For example, to access the micro:bit's thermometer, we access theinputnamespace to get the temperature function. -
We use a dot between the words
basicandforeverto denote that theforeverfunction belongs to thebasicnamespace. -
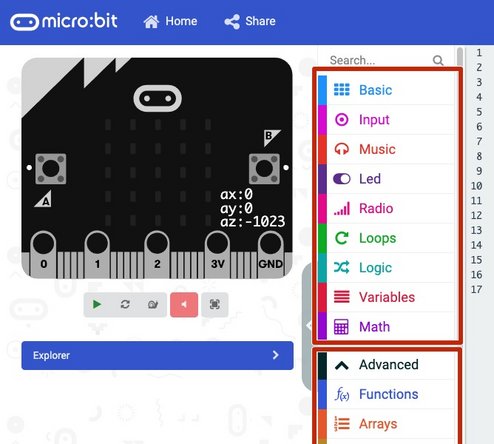
You can view all the namespaces and enclosed functions by looking on the sidebar and clicking on each category. If you click on one of the enclosed functions it will automatically add it to your program.
-
-
-
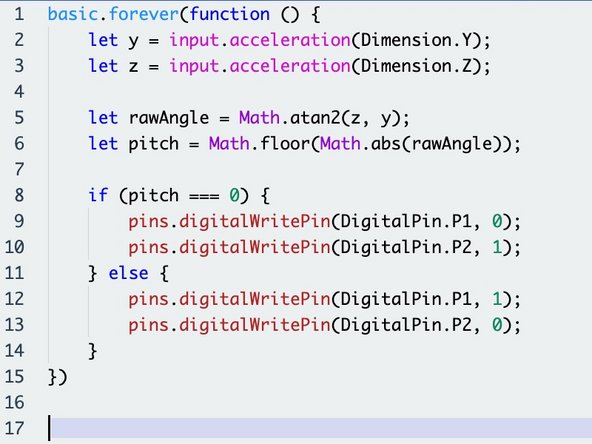
To start out in TypeScript, let's write a simple program which will use the micro:bit's accelerometer and the LED module to work as a digital spirit level.
-
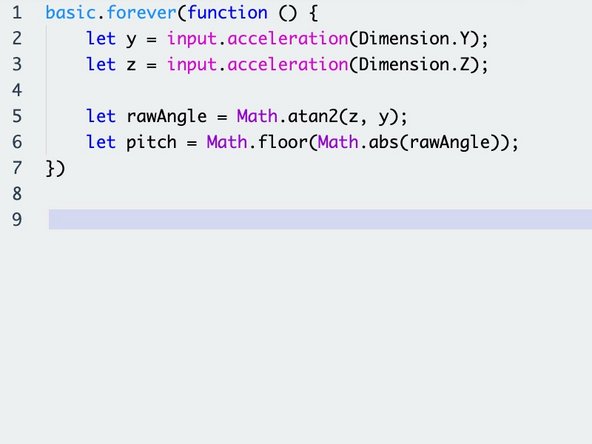
We start by writing our code inside the forever function so that the program knows to loop our code forever.
-
On lines 2 and 3, we define two variables,
zandy, which store the force of gravity in its respective dimensions. We can access these by referring to theaccelerationfunction found in theinputnamespace. -
Note the difference in variable definition in TypeScript vs. Python. In TypeScript, we must use the
letcommand to tell the computer that we're defining a variable. -
We then use some in-built math functions to calculate the angle that the level is pitched at on lines 5 and 6.
-
For those familiar with trigonometry, we use the tan function to calculate the angle!
-
-
-
On line 8, we use an
if...elsestatement to see if the angle is 0 (i.e. flat). Notice the use of brackets to indicate where the comparison takes place. -
In TypeScript, we use the curly brackets
{...}to indicate what code belongs to what, rather than the colon and indentation style that Python uses. -
Finally we can access the
digitalWritePinfunction in thepinsnamespace to turn the led green if the micro:bit is level, or red if it's not. Notice that the write pin function takes two arguments, the pin number and the value to write.
-
-
-
Before building the spirit level, it's important to address a few other crucial elements in how TypeScript differs from Python.
-
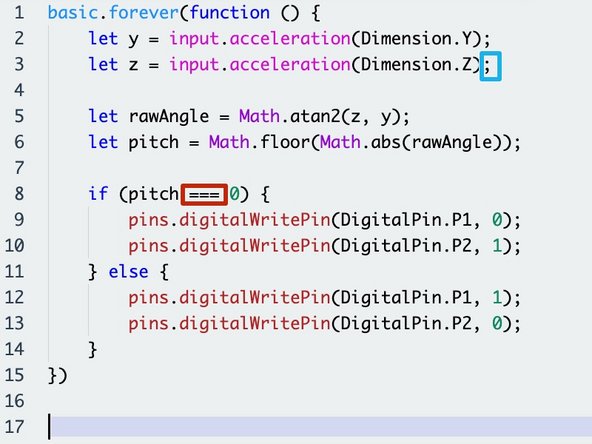
Notice how each statement ends in a semi-colon. Whilst this isn't strictly necessary, it is considered best practice and may avoid some weird errors!
-
To test whether something is equal in TypeScript, we use three = signs rather than the two in Python. To test if something is not equal, we use
!==instead of!=. You may encounter issues if you use two!
-
-
-
Remove any motors and the trackball on the board.
-
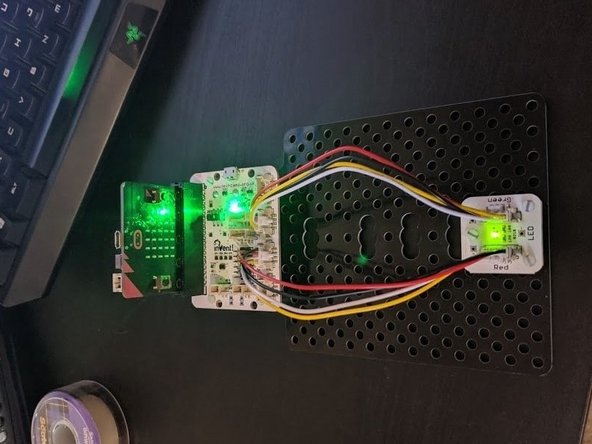
Connect the LED module to the board, connected the red LED to P1 and the green LED to P2.
-
-
-
Click the download button on the MakeCode page. This will download a hex file like before which you can drag to the micro:bit.
-
You can also pair the micro:bit by going to settings and selecting the "Pair device" option. This will let you install to the micro:bit straight from the MakeCode editor!
-
-
-
Turn on the micro:bit from the power switch on the board and place it on a flat surface. You should see the light go green, indicating that the surface is flat.
-
Now try to rotate the board. The light should go red again. If so, your spirit level works!
-
-
-
Many digital spirit levels have some sort of audio feedback along with the lights.
-
Can you add support for a buzzer to the program which turns on the buzzer when the level is flat and off when it is not?
-


